OBi
-
{"id":7902718853259,"title":"OBi Stax Bar","handle":"obi-stax-bar","description":"\u003ch2 data-start=\"228\" data-end=\"245\"\u003eOBi Stax Bar\u003c\/h2\u003e\n\u003cp data-start=\"247\" data-end=\"618\"\u003e\u003cstrong data-start=\"247\" data-end=\"284\"\u003eThe backbone of your Stax system.\u003c\/strong\u003e\u003cbr data-start=\"284\" data-end=\"287\"\u003eThe \u003cstrong data-start=\"291\" data-end=\"307\"\u003eOBi Stax Bar\u003c\/strong\u003e is the foundation piece that everything else connects to. It’s designed to support Stax Blocks, Bushings, and Drops, keeping your reloading dies and tools neat, secure, and easy to access. Mount it to the wall for a clean, vertical layout or use it on the bench with Stax Drops for a stable countertop setup.\u003c\/p\u003e\n\u003ch3 data-start=\"620\" data-end=\"634\"\u003eFeatures\u003c\/h3\u003e\n\u003cul data-start=\"635\" data-end=\"855\"\u003e\n\u003cli data-start=\"635\" data-end=\"711\"\u003e\n\u003cp data-start=\"637\" data-end=\"711\"\u003e\u003cstrong data-start=\"637\" data-end=\"658\"\u003eStrong foundation\u003c\/strong\u003e – The core mounting rail for the full Stax system.\u003c\/p\u003e\n\u003c\/li\u003e\n\u003cli data-start=\"712\" data-end=\"776\"\u003e\n\u003cp data-start=\"714\" data-end=\"776\"\u003e\u003cstrong data-start=\"714\" data-end=\"732\"\u003eFlexible setup\u003c\/strong\u003e – Mount to a wall or use on a countertop.\u003c\/p\u003e\n\u003c\/li\u003e\n\u003cli data-start=\"777\" data-end=\"855\"\u003e\n\u003cp data-start=\"779\" data-end=\"855\"\u003e\u003cstrong data-start=\"779\" data-end=\"793\"\u003eExpandable\u003c\/strong\u003e – Add Blocks, Drops, and Bushings as your collection grows.\u003c\/p\u003e\n\u003c\/li\u003e\n\u003c\/ul\u003e\n\u003ch3 data-start=\"857\" data-end=\"875\"\u003eRequirements\u003c\/h3\u003e\n\u003cul data-start=\"876\" data-end=\"960\"\u003e\n\u003cli data-start=\"876\" data-end=\"960\"\u003e\n\u003cp data-start=\"878\" data-end=\"960\"\u003eAt least one \u003cstrong data-start=\"891\" data-end=\"905\"\u003eStax Block\u003c\/strong\u003e or \u003cstrong data-start=\"909\" data-end=\"925\"\u003eStax Bushing\u003c\/strong\u003e is needed to hold dies or tools.\u003c\/p\u003e\n\u003c\/li\u003e\n\u003c\/ul\u003e\n\u003ch3 data-start=\"962\" data-end=\"978\"\u003eIn the box\u003c\/h3\u003e\n\u003cul data-start=\"979\" data-end=\"1050\"\u003e\n\u003cli data-start=\"979\" data-end=\"1050\"\u003e\n\u003cp data-start=\"981\" data-end=\"1050\"\u003e1 × \u003cstrong data-start=\"985\" data-end=\"1001\"\u003eOBi Stax Bar\u003c\/strong\u003e (Blocks, Bushings, and Drops sold separately).\u003c\/p\u003e\n\u003c\/li\u003e\n\u003c\/ul\u003e","published_at":"2025-09-12T08:05:30+10:00","created_at":"2025-09-12T07:53:22+10:00","vendor":"Australian Tactical","type":"","tags":["OBi","Old balls inc","Reloading"],"price":6995,"price_min":6995,"price_max":6995,"available":true,"price_varies":false,"compare_at_price":null,"compare_at_price_min":0,"compare_at_price_max":0,"compare_at_price_varies":false,"variants":[{"id":43996320366731,"title":"Default Title","option1":"Default Title","option2":null,"option3":null,"sku":"StaxBar","requires_shipping":true,"taxable":true,"featured_image":null,"available":true,"name":"OBi Stax Bar","public_title":null,"options":["Default Title"],"price":6995,"weight":1000,"compare_at_price":null,"inventory_management":"shopify","barcode":"","requires_selling_plan":false,"selling_plan_allocations":[]}],"images":["\/\/australiantactical.com.au\/cdn\/shop\/files\/PhotoRoom_20231005_0844492_1400x_f56d4387-c979-452d-8321-6564f60be181.jpg?v=1757627469","\/\/australiantactical.com.au\/cdn\/shop\/files\/images_17_023ec17c-4adc-4a77-814d-9d8d18380712.jpg?v=1757627477","\/\/australiantactical.com.au\/cdn\/shop\/files\/PhotoRoom_20231005_084349_1f0e8d0a-f923-4bab-b8f7-1d4d70112907.jpg?v=1757627487","\/\/australiantactical.com.au\/cdn\/shop\/files\/images_18_22db0daf-7a62-4fe7-a42d-ac51c56dcfad.jpg?v=1757627532"],"featured_image":"\/\/australiantactical.com.au\/cdn\/shop\/files\/PhotoRoom_20231005_0844492_1400x_f56d4387-c979-452d-8321-6564f60be181.jpg?v=1757627469","options":["Title"],"media":[{"alt":null,"id":30111482642571,"position":1,"preview_image":{"aspect_ratio":0.996,"height":1406,"width":1400,"src":"\/\/australiantactical.com.au\/cdn\/shop\/files\/PhotoRoom_20231005_0844492_1400x_f56d4387-c979-452d-8321-6564f60be181.jpg?v=1757627469"},"aspect_ratio":0.996,"height":1406,"media_type":"image","src":"\/\/australiantactical.com.au\/cdn\/shop\/files\/PhotoRoom_20231005_0844492_1400x_f56d4387-c979-452d-8321-6564f60be181.jpg?v=1757627469","width":1400},{"alt":null,"id":30111483854987,"position":2,"preview_image":{"aspect_ratio":1.0,"height":554,"width":554,"src":"\/\/australiantactical.com.au\/cdn\/shop\/files\/images_17_023ec17c-4adc-4a77-814d-9d8d18380712.jpg?v=1757627477"},"aspect_ratio":1.0,"height":554,"media_type":"image","src":"\/\/australiantactical.com.au\/cdn\/shop\/files\/images_17_023ec17c-4adc-4a77-814d-9d8d18380712.jpg?v=1757627477","width":554},{"alt":null,"id":30111484706955,"position":3,"preview_image":{"aspect_ratio":1.003,"height":1500,"width":1504,"src":"\/\/australiantactical.com.au\/cdn\/shop\/files\/PhotoRoom_20231005_084349_1f0e8d0a-f923-4bab-b8f7-1d4d70112907.jpg?v=1757627487"},"aspect_ratio":1.003,"height":1500,"media_type":"image","src":"\/\/australiantactical.com.au\/cdn\/shop\/files\/PhotoRoom_20231005_084349_1f0e8d0a-f923-4bab-b8f7-1d4d70112907.jpg?v=1757627487","width":1504},{"alt":null,"id":30111494668427,"position":4,"preview_image":{"aspect_ratio":1.0,"height":554,"width":554,"src":"\/\/australiantactical.com.au\/cdn\/shop\/files\/images_18_22db0daf-7a62-4fe7-a42d-ac51c56dcfad.jpg?v=1757627532"},"aspect_ratio":1.0,"height":554,"media_type":"image","src":"\/\/australiantactical.com.au\/cdn\/shop\/files\/images_18_22db0daf-7a62-4fe7-a42d-ac51c56dcfad.jpg?v=1757627532","width":554}],"requires_selling_plan":false,"selling_plan_groups":[],"content":"\u003ch2 data-start=\"228\" data-end=\"245\"\u003eOBi Stax Bar\u003c\/h2\u003e\n\u003cp data-start=\"247\" data-end=\"618\"\u003e\u003cstrong data-start=\"247\" data-end=\"284\"\u003eThe backbone of your Stax system.\u003c\/strong\u003e\u003cbr data-start=\"284\" data-end=\"287\"\u003eThe \u003cstrong data-start=\"291\" data-end=\"307\"\u003eOBi Stax Bar\u003c\/strong\u003e is the foundation piece that everything else connects to. It’s designed to support Stax Blocks, Bushings, and Drops, keeping your reloading dies and tools neat, secure, and easy to access. Mount it to the wall for a clean, vertical layout or use it on the bench with Stax Drops for a stable countertop setup.\u003c\/p\u003e\n\u003ch3 data-start=\"620\" data-end=\"634\"\u003eFeatures\u003c\/h3\u003e\n\u003cul data-start=\"635\" data-end=\"855\"\u003e\n\u003cli data-start=\"635\" data-end=\"711\"\u003e\n\u003cp data-start=\"637\" data-end=\"711\"\u003e\u003cstrong data-start=\"637\" data-end=\"658\"\u003eStrong foundation\u003c\/strong\u003e – The core mounting rail for the full Stax system.\u003c\/p\u003e\n\u003c\/li\u003e\n\u003cli data-start=\"712\" data-end=\"776\"\u003e\n\u003cp data-start=\"714\" data-end=\"776\"\u003e\u003cstrong data-start=\"714\" data-end=\"732\"\u003eFlexible setup\u003c\/strong\u003e – Mount to a wall or use on a countertop.\u003c\/p\u003e\n\u003c\/li\u003e\n\u003cli data-start=\"777\" data-end=\"855\"\u003e\n\u003cp data-start=\"779\" data-end=\"855\"\u003e\u003cstrong data-start=\"779\" data-end=\"793\"\u003eExpandable\u003c\/strong\u003e – Add Blocks, Drops, and Bushings as your collection grows.\u003c\/p\u003e\n\u003c\/li\u003e\n\u003c\/ul\u003e\n\u003ch3 data-start=\"857\" data-end=\"875\"\u003eRequirements\u003c\/h3\u003e\n\u003cul data-start=\"876\" data-end=\"960\"\u003e\n\u003cli data-start=\"876\" data-end=\"960\"\u003e\n\u003cp data-start=\"878\" data-end=\"960\"\u003eAt least one \u003cstrong data-start=\"891\" data-end=\"905\"\u003eStax Block\u003c\/strong\u003e or \u003cstrong data-start=\"909\" data-end=\"925\"\u003eStax Bushing\u003c\/strong\u003e is needed to hold dies or tools.\u003c\/p\u003e\n\u003c\/li\u003e\n\u003c\/ul\u003e\n\u003ch3 data-start=\"962\" data-end=\"978\"\u003eIn the box\u003c\/h3\u003e\n\u003cul data-start=\"979\" data-end=\"1050\"\u003e\n\u003cli data-start=\"979\" data-end=\"1050\"\u003e\n\u003cp data-start=\"981\" data-end=\"1050\"\u003e1 × \u003cstrong data-start=\"985\" data-end=\"1001\"\u003eOBi Stax Bar\u003c\/strong\u003e (Blocks, Bushings, and Drops sold separately).\u003c\/p\u003e\n\u003c\/li\u003e\n\u003c\/ul\u003e"}
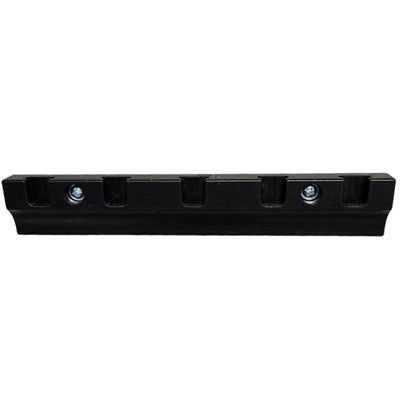
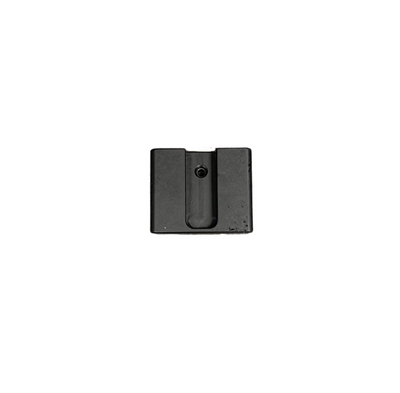
OBi Stax Bar
The backbone of your Stax system.
The OBi Stax Bar is the foundation piece that everything else connects to. It’s designed to support Stax Blocks, Bushings, and Drops, keeping your reloading dies and tools neat, secure, and easy to access. Mount it to the wall for a clean, vertical layout or use it on the bench with Stax Drops for a stable countertop setup.
Features
-
Strong foundation – The core mounting rail for the full Stax system.
-
Flexible setup – Mount to a wall or use on a countertop.
-
Expandable – Add Blocks, Drops, and Bushings as your collection grows.
Requirements
-
At least one Stax Block or Stax Bushing is needed to hold dies or tools.
In the box
-
1 × OBi Stax Bar (Blocks, Bushings, and Drops sold separately).
-
{"id":7902718853259,"title":"OBi Stax Bar","handle":"obi-stax-bar","description":"\u003ch2 data-start=\"228\" data-end=\"245\"\u003eOBi Stax Bar\u003c\/h2\u003e\n\u003cp data-start=\"247\" data-end=\"618\"\u003e\u003cstrong data-start=\"247\" data-end=\"284\"\u003eThe backbone of your Stax system.\u003c\/strong\u003e\u003cbr data-start=\"284\" data-end=\"287\"\u003eThe \u003cstrong data-start=\"291\" data-end=\"307\"\u003eOBi Stax Bar\u003c\/strong\u003e is the foundation piece that everything else connects to. It’s designed to support Stax Blocks, Bushings, and Drops, keeping your reloading dies and tools neat, secure, and easy to access. Mount it to the wall for a clean, vertical layout or use it on the bench with Stax Drops for a stable countertop setup.\u003c\/p\u003e\n\u003ch3 data-start=\"620\" data-end=\"634\"\u003eFeatures\u003c\/h3\u003e\n\u003cul data-start=\"635\" data-end=\"855\"\u003e\n\u003cli data-start=\"635\" data-end=\"711\"\u003e\n\u003cp data-start=\"637\" data-end=\"711\"\u003e\u003cstrong data-start=\"637\" data-end=\"658\"\u003eStrong foundation\u003c\/strong\u003e – The core mounting rail for the full Stax system.\u003c\/p\u003e\n\u003c\/li\u003e\n\u003cli data-start=\"712\" data-end=\"776\"\u003e\n\u003cp data-start=\"714\" data-end=\"776\"\u003e\u003cstrong data-start=\"714\" data-end=\"732\"\u003eFlexible setup\u003c\/strong\u003e – Mount to a wall or use on a countertop.\u003c\/p\u003e\n\u003c\/li\u003e\n\u003cli data-start=\"777\" data-end=\"855\"\u003e\n\u003cp data-start=\"779\" data-end=\"855\"\u003e\u003cstrong data-start=\"779\" data-end=\"793\"\u003eExpandable\u003c\/strong\u003e – Add Blocks, Drops, and Bushings as your collection grows.\u003c\/p\u003e\n\u003c\/li\u003e\n\u003c\/ul\u003e\n\u003ch3 data-start=\"857\" data-end=\"875\"\u003eRequirements\u003c\/h3\u003e\n\u003cul data-start=\"876\" data-end=\"960\"\u003e\n\u003cli data-start=\"876\" data-end=\"960\"\u003e\n\u003cp data-start=\"878\" data-end=\"960\"\u003eAt least one \u003cstrong data-start=\"891\" data-end=\"905\"\u003eStax Block\u003c\/strong\u003e or \u003cstrong data-start=\"909\" data-end=\"925\"\u003eStax Bushing\u003c\/strong\u003e is needed to hold dies or tools.\u003c\/p\u003e\n\u003c\/li\u003e\n\u003c\/ul\u003e\n\u003ch3 data-start=\"962\" data-end=\"978\"\u003eIn the box\u003c\/h3\u003e\n\u003cul data-start=\"979\" data-end=\"1050\"\u003e\n\u003cli data-start=\"979\" data-end=\"1050\"\u003e\n\u003cp data-start=\"981\" data-end=\"1050\"\u003e1 × \u003cstrong data-start=\"985\" data-end=\"1001\"\u003eOBi Stax Bar\u003c\/strong\u003e (Blocks, Bushings, and Drops sold separately).\u003c\/p\u003e\n\u003c\/li\u003e\n\u003c\/ul\u003e","published_at":"2025-09-12T08:05:30+10:00","created_at":"2025-09-12T07:53:22+10:00","vendor":"Australian Tactical","type":"","tags":["OBi","Old balls inc","Reloading"],"price":6995,"price_min":6995,"price_max":6995,"available":true,"price_varies":false,"compare_at_price":null,"compare_at_price_min":0,"compare_at_price_max":0,"compare_at_price_varies":false,"variants":[{"id":43996320366731,"title":"Default Title","option1":"Default Title","option2":null,"option3":null,"sku":"StaxBar","requires_shipping":true,"taxable":true,"featured_image":null,"available":true,"name":"OBi Stax Bar","public_title":null,"options":["Default Title"],"price":6995,"weight":1000,"compare_at_price":null,"inventory_management":"shopify","barcode":"","requires_selling_plan":false,"selling_plan_allocations":[]}],"images":["\/\/australiantactical.com.au\/cdn\/shop\/files\/PhotoRoom_20231005_0844492_1400x_f56d4387-c979-452d-8321-6564f60be181.jpg?v=1757627469","\/\/australiantactical.com.au\/cdn\/shop\/files\/images_17_023ec17c-4adc-4a77-814d-9d8d18380712.jpg?v=1757627477","\/\/australiantactical.com.au\/cdn\/shop\/files\/PhotoRoom_20231005_084349_1f0e8d0a-f923-4bab-b8f7-1d4d70112907.jpg?v=1757627487","\/\/australiantactical.com.au\/cdn\/shop\/files\/images_18_22db0daf-7a62-4fe7-a42d-ac51c56dcfad.jpg?v=1757627532"],"featured_image":"\/\/australiantactical.com.au\/cdn\/shop\/files\/PhotoRoom_20231005_0844492_1400x_f56d4387-c979-452d-8321-6564f60be181.jpg?v=1757627469","options":["Title"],"media":[{"alt":null,"id":30111482642571,"position":1,"preview_image":{"aspect_ratio":0.996,"height":1406,"width":1400,"src":"\/\/australiantactical.com.au\/cdn\/shop\/files\/PhotoRoom_20231005_0844492_1400x_f56d4387-c979-452d-8321-6564f60be181.jpg?v=1757627469"},"aspect_ratio":0.996,"height":1406,"media_type":"image","src":"\/\/australiantactical.com.au\/cdn\/shop\/files\/PhotoRoom_20231005_0844492_1400x_f56d4387-c979-452d-8321-6564f60be181.jpg?v=1757627469","width":1400},{"alt":null,"id":30111483854987,"position":2,"preview_image":{"aspect_ratio":1.0,"height":554,"width":554,"src":"\/\/australiantactical.com.au\/cdn\/shop\/files\/images_17_023ec17c-4adc-4a77-814d-9d8d18380712.jpg?v=1757627477"},"aspect_ratio":1.0,"height":554,"media_type":"image","src":"\/\/australiantactical.com.au\/cdn\/shop\/files\/images_17_023ec17c-4adc-4a77-814d-9d8d18380712.jpg?v=1757627477","width":554},{"alt":null,"id":30111484706955,"position":3,"preview_image":{"aspect_ratio":1.003,"height":1500,"width":1504,"src":"\/\/australiantactical.com.au\/cdn\/shop\/files\/PhotoRoom_20231005_084349_1f0e8d0a-f923-4bab-b8f7-1d4d70112907.jpg?v=1757627487"},"aspect_ratio":1.003,"height":1500,"media_type":"image","src":"\/\/australiantactical.com.au\/cdn\/shop\/files\/PhotoRoom_20231005_084349_1f0e8d0a-f923-4bab-b8f7-1d4d70112907.jpg?v=1757627487","width":1504},{"alt":null,"id":30111494668427,"position":4,"preview_image":{"aspect_ratio":1.0,"height":554,"width":554,"src":"\/\/australiantactical.com.au\/cdn\/shop\/files\/images_18_22db0daf-7a62-4fe7-a42d-ac51c56dcfad.jpg?v=1757627532"},"aspect_ratio":1.0,"height":554,"media_type":"image","src":"\/\/australiantactical.com.au\/cdn\/shop\/files\/images_18_22db0daf-7a62-4fe7-a42d-ac51c56dcfad.jpg?v=1757627532","width":554}],"requires_selling_plan":false,"selling_plan_groups":[],"content":"\u003ch2 data-start=\"228\" data-end=\"245\"\u003eOBi Stax Bar\u003c\/h2\u003e\n\u003cp data-start=\"247\" data-end=\"618\"\u003e\u003cstrong data-start=\"247\" data-end=\"284\"\u003eThe backbone of your Stax system.\u003c\/strong\u003e\u003cbr data-start=\"284\" data-end=\"287\"\u003eThe \u003cstrong data-start=\"291\" data-end=\"307\"\u003eOBi Stax Bar\u003c\/strong\u003e is the foundation piece that everything else connects to. It’s designed to support Stax Blocks, Bushings, and Drops, keeping your reloading dies and tools neat, secure, and easy to access. Mount it to the wall for a clean, vertical layout or use it on the bench with Stax Drops for a stable countertop setup.\u003c\/p\u003e\n\u003ch3 data-start=\"620\" data-end=\"634\"\u003eFeatures\u003c\/h3\u003e\n\u003cul data-start=\"635\" data-end=\"855\"\u003e\n\u003cli data-start=\"635\" data-end=\"711\"\u003e\n\u003cp data-start=\"637\" data-end=\"711\"\u003e\u003cstrong data-start=\"637\" data-end=\"658\"\u003eStrong foundation\u003c\/strong\u003e – The core mounting rail for the full Stax system.\u003c\/p\u003e\n\u003c\/li\u003e\n\u003cli data-start=\"712\" data-end=\"776\"\u003e\n\u003cp data-start=\"714\" data-end=\"776\"\u003e\u003cstrong data-start=\"714\" data-end=\"732\"\u003eFlexible setup\u003c\/strong\u003e – Mount to a wall or use on a countertop.\u003c\/p\u003e\n\u003c\/li\u003e\n\u003cli data-start=\"777\" data-end=\"855\"\u003e\n\u003cp data-start=\"779\" data-end=\"855\"\u003e\u003cstrong data-start=\"779\" data-end=\"793\"\u003eExpandable\u003c\/strong\u003e – Add Blocks, Drops, and Bushings as your collection grows.\u003c\/p\u003e\n\u003c\/li\u003e\n\u003c\/ul\u003e\n\u003ch3 data-start=\"857\" data-end=\"875\"\u003eRequirements\u003c\/h3\u003e\n\u003cul data-start=\"876\" data-end=\"960\"\u003e\n\u003cli data-start=\"876\" data-end=\"960\"\u003e\n\u003cp data-start=\"878\" data-end=\"960\"\u003eAt least one \u003cstrong data-start=\"891\" data-end=\"905\"\u003eStax Block\u003c\/strong\u003e or \u003cstrong data-start=\"909\" data-end=\"925\"\u003eStax Bushing\u003c\/strong\u003e is needed to hold dies or tools.\u003c\/p\u003e\n\u003c\/li\u003e\n\u003c\/ul\u003e\n\u003ch3 data-start=\"962\" data-end=\"978\"\u003eIn the box\u003c\/h3\u003e\n\u003cul data-start=\"979\" data-end=\"1050\"\u003e\n\u003cli data-start=\"979\" data-end=\"1050\"\u003e\n\u003cp data-start=\"981\" data-end=\"1050\"\u003e1 × \u003cstrong data-start=\"985\" data-end=\"1001\"\u003eOBi Stax Bar\u003c\/strong\u003e (Blocks, Bushings, and Drops sold separately).\u003c\/p\u003e\n\u003c\/li\u003e\n\u003c\/ul\u003e"}
OBi Stax Bar
The backbone of your Stax system.
The OBi Stax Bar is the foundation piece that everything else connects to. It’s designed to support Stax Blocks, Bushings, and Drops, keeping your reloading dies and tools neat, secure, and easy to access. Mount it to the wall for a clean, vertical layout or use it on the bench with Stax Drops for a stable countertop setup.
Features
-
Strong foundation – The core mounting rail for the full Stax system.
-
Flexible setup – Mount to a wall or use on a countertop.
-
Expandable – Add Blocks, Drops, and Bushings as your collection grows.
Requirements
-
At least one Stax Block or Stax Bushing is needed to hold dies or tools.
In the box
-
1 × OBi Stax Bar (Blocks, Bushings, and Drops sold separately).
-
{"id":7902722850955,"title":"OBi Stax Bushing","handle":"obi-stax-bushing","description":"\u003ch2 data-start=\"2581\" data-end=\"2602\"\u003eOBi Stax Bushing\u003c\/h2\u003e\n\u003cp data-start=\"2604\" data-end=\"2882\"\u003e\u003cstrong data-start=\"2604\" data-end=\"2638\"\u003eSmall parts, perfectly stored.\u003c\/strong\u003e\u003cbr data-start=\"2638\" data-end=\"2641\"\u003eThe \u003cstrong data-start=\"2645\" data-end=\"2665\"\u003eOBi Stax Bushing\u003c\/strong\u003e is purpose-built for the precision pieces that often go missing. It neatly holds \u003cstrong data-start=\"2747\" data-end=\"2827\"\u003etwo neck bushings, one expander ball, and up to two Allen keys or decap pins\u003c\/strong\u003e, keeping them visible and right where you need them.\u003c\/p\u003e\n\u003ch3 data-start=\"2884\" data-end=\"2898\"\u003eFeatures\u003c\/h3\u003e\n\u003cul data-start=\"2899\" data-end=\"3115\"\u003e\n\u003cli data-start=\"2899\" data-end=\"2969\"\u003e\n\u003cp data-start=\"2901\" data-end=\"2969\"\u003e\u003cstrong data-start=\"2901\" data-end=\"2922\"\u003eDedicated storage\u003c\/strong\u003e – Prevents small parts from being misplaced.\u003c\/p\u003e\n\u003c\/li\u003e\n\u003cli data-start=\"2970\" data-end=\"3046\"\u003e\n\u003cp data-start=\"2972\" data-end=\"3046\"\u003e\u003cstrong data-start=\"2972\" data-end=\"2988\"\u003eSystem ready\u003c\/strong\u003e – Mounts to the Stax Bar or sits on a bench with Drops.\u003c\/p\u003e\n\u003c\/li\u003e\n\u003cli data-start=\"3047\" data-end=\"3115\"\u003e\n\u003cp data-start=\"3049\" data-end=\"3115\"\u003e\u003cstrong data-start=\"3049\" data-end=\"3070\"\u003eCompact \u0026amp; modular\u003c\/strong\u003e – Fits seamlessly beside Blocks and Drops.\u003c\/p\u003e\n\u003c\/li\u003e\n\u003c\/ul\u003e\n\u003ch3 data-start=\"3117\" data-end=\"3135\"\u003eRequirements\u003c\/h3\u003e\n\u003cul data-start=\"3136\" data-end=\"3253\"\u003e\n\u003cli data-start=\"3136\" data-end=\"3199\"\u003e\n\u003cp data-start=\"3138\" data-end=\"3199\"\u003eAt least one \u003cstrong data-start=\"3151\" data-end=\"3163\"\u003eStax Bar\u003c\/strong\u003e is required to mount the Bushing.\u003c\/p\u003e\n\u003c\/li\u003e\n\u003cli data-start=\"3200\" data-end=\"3253\"\u003e\n\u003cp data-start=\"3202\" data-end=\"3253\"\u003e\u003cstrong data-start=\"3202\" data-end=\"3216\"\u003eStax Drops\u003c\/strong\u003e recommended for countertop setups.\u003c\/p\u003e\n\u003c\/li\u003e\n\u003c\/ul\u003e\n\u003ch3 data-start=\"3255\" data-end=\"3271\"\u003eIn the box\u003c\/h3\u003e\n\u003cul data-start=\"3272\" data-end=\"3342\"\u003e\n\u003cli data-start=\"3272\" data-end=\"3342\"\u003e\n\u003cp data-start=\"3274\" data-end=\"3342\"\u003e1 × \u003cstrong data-start=\"3278\" data-end=\"3298\"\u003eOBi Stax Bushing\u003c\/strong\u003e (Bar, Blocks, and Drops sold separately).\u003c\/p\u003e\n\u003c\/li\u003e\n\u003c\/ul\u003e","published_at":"2025-09-12T08:05:31+10:00","created_at":"2025-09-12T07:58:58+10:00","vendor":"Australian Tactical","type":"","tags":["OBi","old balls inc","Reloading"],"price":5995,"price_min":5995,"price_max":5995,"available":true,"price_varies":false,"compare_at_price":null,"compare_at_price_min":0,"compare_at_price_max":0,"compare_at_price_varies":false,"variants":[{"id":43996331704459,"title":"Default Title","option1":"Default Title","option2":null,"option3":null,"sku":"StaxBushing","requires_shipping":true,"taxable":true,"featured_image":null,"available":true,"name":"OBi Stax Bushing","public_title":null,"options":["Default Title"],"price":5995,"weight":1000,"compare_at_price":null,"inventory_management":"shopify","barcode":"","requires_selling_plan":false,"selling_plan_allocations":[]}],"images":["\/\/australiantactical.com.au\/cdn\/shop\/files\/Newdiestaxbushing_1080x_f7a45646-1d70-45ee-8002-c0600e3f4cea.png?v=1757627910","\/\/australiantactical.com.au\/cdn\/shop\/files\/Screenshot2023-10-05105900_1080x_28f8f05d-b6c4-4306-bac5-7edb2871b99b.png?v=1757627920","\/\/australiantactical.com.au\/cdn\/shop\/files\/images_17_5756778b-aaf9-488b-9a60-55fda2ef8da8.jpg?v=1757627924","\/\/australiantactical.com.au\/cdn\/shop\/files\/PhotoRoom_20231005_084349_774a1151-0063-491b-826c-78528f3caf65.jpg?v=1757627931","\/\/australiantactical.com.au\/cdn\/shop\/files\/images_18_5055402d-cba2-41be-a021-e19c091b2982.jpg?v=1757627932"],"featured_image":"\/\/australiantactical.com.au\/cdn\/shop\/files\/Newdiestaxbushing_1080x_f7a45646-1d70-45ee-8002-c0600e3f4cea.png?v=1757627910","options":["Title"],"media":[{"alt":null,"id":30111546441867,"position":1,"preview_image":{"aspect_ratio":0.983,"height":1099,"width":1080,"src":"\/\/australiantactical.com.au\/cdn\/shop\/files\/Newdiestaxbushing_1080x_f7a45646-1d70-45ee-8002-c0600e3f4cea.png?v=1757627910"},"aspect_ratio":0.983,"height":1099,"media_type":"image","src":"\/\/australiantactical.com.au\/cdn\/shop\/files\/Newdiestaxbushing_1080x_f7a45646-1d70-45ee-8002-c0600e3f4cea.png?v=1757627910","width":1080},{"alt":null,"id":30111546998923,"position":2,"preview_image":{"aspect_ratio":0.979,"height":804,"width":787,"src":"\/\/australiantactical.com.au\/cdn\/shop\/files\/Screenshot2023-10-05105900_1080x_28f8f05d-b6c4-4306-bac5-7edb2871b99b.png?v=1757627920"},"aspect_ratio":0.979,"height":804,"media_type":"image","src":"\/\/australiantactical.com.au\/cdn\/shop\/files\/Screenshot2023-10-05105900_1080x_28f8f05d-b6c4-4306-bac5-7edb2871b99b.png?v=1757627920","width":787},{"alt":null,"id":30111547457675,"position":3,"preview_image":{"aspect_ratio":1.0,"height":554,"width":554,"src":"\/\/australiantactical.com.au\/cdn\/shop\/files\/images_17_5756778b-aaf9-488b-9a60-55fda2ef8da8.jpg?v=1757627924"},"aspect_ratio":1.0,"height":554,"media_type":"image","src":"\/\/australiantactical.com.au\/cdn\/shop\/files\/images_17_5756778b-aaf9-488b-9a60-55fda2ef8da8.jpg?v=1757627924","width":554},{"alt":null,"id":30111548440715,"position":4,"preview_image":{"aspect_ratio":1.003,"height":1500,"width":1504,"src":"\/\/australiantactical.com.au\/cdn\/shop\/files\/PhotoRoom_20231005_084349_774a1151-0063-491b-826c-78528f3caf65.jpg?v=1757627931"},"aspect_ratio":1.003,"height":1500,"media_type":"image","src":"\/\/australiantactical.com.au\/cdn\/shop\/files\/PhotoRoom_20231005_084349_774a1151-0063-491b-826c-78528f3caf65.jpg?v=1757627931","width":1504},{"alt":null,"id":30111548473483,"position":5,"preview_image":{"aspect_ratio":1.0,"height":554,"width":554,"src":"\/\/australiantactical.com.au\/cdn\/shop\/files\/images_18_5055402d-cba2-41be-a021-e19c091b2982.jpg?v=1757627932"},"aspect_ratio":1.0,"height":554,"media_type":"image","src":"\/\/australiantactical.com.au\/cdn\/shop\/files\/images_18_5055402d-cba2-41be-a021-e19c091b2982.jpg?v=1757627932","width":554}],"requires_selling_plan":false,"selling_plan_groups":[],"content":"\u003ch2 data-start=\"2581\" data-end=\"2602\"\u003eOBi Stax Bushing\u003c\/h2\u003e\n\u003cp data-start=\"2604\" data-end=\"2882\"\u003e\u003cstrong data-start=\"2604\" data-end=\"2638\"\u003eSmall parts, perfectly stored.\u003c\/strong\u003e\u003cbr data-start=\"2638\" data-end=\"2641\"\u003eThe \u003cstrong data-start=\"2645\" data-end=\"2665\"\u003eOBi Stax Bushing\u003c\/strong\u003e is purpose-built for the precision pieces that often go missing. It neatly holds \u003cstrong data-start=\"2747\" data-end=\"2827\"\u003etwo neck bushings, one expander ball, and up to two Allen keys or decap pins\u003c\/strong\u003e, keeping them visible and right where you need them.\u003c\/p\u003e\n\u003ch3 data-start=\"2884\" data-end=\"2898\"\u003eFeatures\u003c\/h3\u003e\n\u003cul data-start=\"2899\" data-end=\"3115\"\u003e\n\u003cli data-start=\"2899\" data-end=\"2969\"\u003e\n\u003cp data-start=\"2901\" data-end=\"2969\"\u003e\u003cstrong data-start=\"2901\" data-end=\"2922\"\u003eDedicated storage\u003c\/strong\u003e – Prevents small parts from being misplaced.\u003c\/p\u003e\n\u003c\/li\u003e\n\u003cli data-start=\"2970\" data-end=\"3046\"\u003e\n\u003cp data-start=\"2972\" data-end=\"3046\"\u003e\u003cstrong data-start=\"2972\" data-end=\"2988\"\u003eSystem ready\u003c\/strong\u003e – Mounts to the Stax Bar or sits on a bench with Drops.\u003c\/p\u003e\n\u003c\/li\u003e\n\u003cli data-start=\"3047\" data-end=\"3115\"\u003e\n\u003cp data-start=\"3049\" data-end=\"3115\"\u003e\u003cstrong data-start=\"3049\" data-end=\"3070\"\u003eCompact \u0026amp; modular\u003c\/strong\u003e – Fits seamlessly beside Blocks and Drops.\u003c\/p\u003e\n\u003c\/li\u003e\n\u003c\/ul\u003e\n\u003ch3 data-start=\"3117\" data-end=\"3135\"\u003eRequirements\u003c\/h3\u003e\n\u003cul data-start=\"3136\" data-end=\"3253\"\u003e\n\u003cli data-start=\"3136\" data-end=\"3199\"\u003e\n\u003cp data-start=\"3138\" data-end=\"3199\"\u003eAt least one \u003cstrong data-start=\"3151\" data-end=\"3163\"\u003eStax Bar\u003c\/strong\u003e is required to mount the Bushing.\u003c\/p\u003e\n\u003c\/li\u003e\n\u003cli data-start=\"3200\" data-end=\"3253\"\u003e\n\u003cp data-start=\"3202\" data-end=\"3253\"\u003e\u003cstrong data-start=\"3202\" data-end=\"3216\"\u003eStax Drops\u003c\/strong\u003e recommended for countertop setups.\u003c\/p\u003e\n\u003c\/li\u003e\n\u003c\/ul\u003e\n\u003ch3 data-start=\"3255\" data-end=\"3271\"\u003eIn the box\u003c\/h3\u003e\n\u003cul data-start=\"3272\" data-end=\"3342\"\u003e\n\u003cli data-start=\"3272\" data-end=\"3342\"\u003e\n\u003cp data-start=\"3274\" data-end=\"3342\"\u003e1 × \u003cstrong data-start=\"3278\" data-end=\"3298\"\u003eOBi Stax Bushing\u003c\/strong\u003e (Bar, Blocks, and Drops sold separately).\u003c\/p\u003e\n\u003c\/li\u003e\n\u003c\/ul\u003e"}
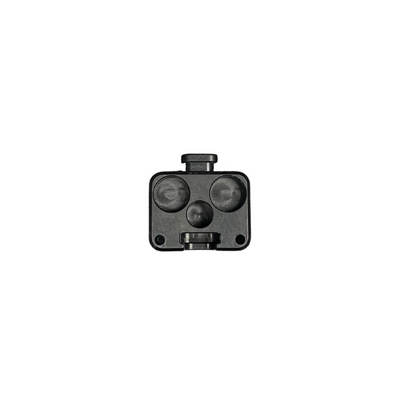
OBi Stax Bushing
Small parts, perfectly stored.
The OBi Stax Bushing is purpose-built for the precision pieces that often go missing. It neatly holds two neck bushings, one expander ball, and up to two Allen keys or decap pins, keeping them visible and right where you need them.
Features
-
Dedicated storage – Prevents small parts from being misplaced.
-
System ready – Mounts to the Stax Bar or sits on a bench with Drops.
-
Compact & modular – Fits seamlessly beside Blocks and Drops.
Requirements
-
At least one Stax Bar is required to mount the Bushing.
-
Stax Drops recommended for countertop setups.
In the box
-
1 × OBi Stax Bushing (Bar, Blocks, and Drops sold separately).
-
{"id":7902722850955,"title":"OBi Stax Bushing","handle":"obi-stax-bushing","description":"\u003ch2 data-start=\"2581\" data-end=\"2602\"\u003eOBi Stax Bushing\u003c\/h2\u003e\n\u003cp data-start=\"2604\" data-end=\"2882\"\u003e\u003cstrong data-start=\"2604\" data-end=\"2638\"\u003eSmall parts, perfectly stored.\u003c\/strong\u003e\u003cbr data-start=\"2638\" data-end=\"2641\"\u003eThe \u003cstrong data-start=\"2645\" data-end=\"2665\"\u003eOBi Stax Bushing\u003c\/strong\u003e is purpose-built for the precision pieces that often go missing. It neatly holds \u003cstrong data-start=\"2747\" data-end=\"2827\"\u003etwo neck bushings, one expander ball, and up to two Allen keys or decap pins\u003c\/strong\u003e, keeping them visible and right where you need them.\u003c\/p\u003e\n\u003ch3 data-start=\"2884\" data-end=\"2898\"\u003eFeatures\u003c\/h3\u003e\n\u003cul data-start=\"2899\" data-end=\"3115\"\u003e\n\u003cli data-start=\"2899\" data-end=\"2969\"\u003e\n\u003cp data-start=\"2901\" data-end=\"2969\"\u003e\u003cstrong data-start=\"2901\" data-end=\"2922\"\u003eDedicated storage\u003c\/strong\u003e – Prevents small parts from being misplaced.\u003c\/p\u003e\n\u003c\/li\u003e\n\u003cli data-start=\"2970\" data-end=\"3046\"\u003e\n\u003cp data-start=\"2972\" data-end=\"3046\"\u003e\u003cstrong data-start=\"2972\" data-end=\"2988\"\u003eSystem ready\u003c\/strong\u003e – Mounts to the Stax Bar or sits on a bench with Drops.\u003c\/p\u003e\n\u003c\/li\u003e\n\u003cli data-start=\"3047\" data-end=\"3115\"\u003e\n\u003cp data-start=\"3049\" data-end=\"3115\"\u003e\u003cstrong data-start=\"3049\" data-end=\"3070\"\u003eCompact \u0026amp; modular\u003c\/strong\u003e – Fits seamlessly beside Blocks and Drops.\u003c\/p\u003e\n\u003c\/li\u003e\n\u003c\/ul\u003e\n\u003ch3 data-start=\"3117\" data-end=\"3135\"\u003eRequirements\u003c\/h3\u003e\n\u003cul data-start=\"3136\" data-end=\"3253\"\u003e\n\u003cli data-start=\"3136\" data-end=\"3199\"\u003e\n\u003cp data-start=\"3138\" data-end=\"3199\"\u003eAt least one \u003cstrong data-start=\"3151\" data-end=\"3163\"\u003eStax Bar\u003c\/strong\u003e is required to mount the Bushing.\u003c\/p\u003e\n\u003c\/li\u003e\n\u003cli data-start=\"3200\" data-end=\"3253\"\u003e\n\u003cp data-start=\"3202\" data-end=\"3253\"\u003e\u003cstrong data-start=\"3202\" data-end=\"3216\"\u003eStax Drops\u003c\/strong\u003e recommended for countertop setups.\u003c\/p\u003e\n\u003c\/li\u003e\n\u003c\/ul\u003e\n\u003ch3 data-start=\"3255\" data-end=\"3271\"\u003eIn the box\u003c\/h3\u003e\n\u003cul data-start=\"3272\" data-end=\"3342\"\u003e\n\u003cli data-start=\"3272\" data-end=\"3342\"\u003e\n\u003cp data-start=\"3274\" data-end=\"3342\"\u003e1 × \u003cstrong data-start=\"3278\" data-end=\"3298\"\u003eOBi Stax Bushing\u003c\/strong\u003e (Bar, Blocks, and Drops sold separately).\u003c\/p\u003e\n\u003c\/li\u003e\n\u003c\/ul\u003e","published_at":"2025-09-12T08:05:31+10:00","created_at":"2025-09-12T07:58:58+10:00","vendor":"Australian Tactical","type":"","tags":["OBi","old balls inc","Reloading"],"price":5995,"price_min":5995,"price_max":5995,"available":true,"price_varies":false,"compare_at_price":null,"compare_at_price_min":0,"compare_at_price_max":0,"compare_at_price_varies":false,"variants":[{"id":43996331704459,"title":"Default Title","option1":"Default Title","option2":null,"option3":null,"sku":"StaxBushing","requires_shipping":true,"taxable":true,"featured_image":null,"available":true,"name":"OBi Stax Bushing","public_title":null,"options":["Default Title"],"price":5995,"weight":1000,"compare_at_price":null,"inventory_management":"shopify","barcode":"","requires_selling_plan":false,"selling_plan_allocations":[]}],"images":["\/\/australiantactical.com.au\/cdn\/shop\/files\/Newdiestaxbushing_1080x_f7a45646-1d70-45ee-8002-c0600e3f4cea.png?v=1757627910","\/\/australiantactical.com.au\/cdn\/shop\/files\/Screenshot2023-10-05105900_1080x_28f8f05d-b6c4-4306-bac5-7edb2871b99b.png?v=1757627920","\/\/australiantactical.com.au\/cdn\/shop\/files\/images_17_5756778b-aaf9-488b-9a60-55fda2ef8da8.jpg?v=1757627924","\/\/australiantactical.com.au\/cdn\/shop\/files\/PhotoRoom_20231005_084349_774a1151-0063-491b-826c-78528f3caf65.jpg?v=1757627931","\/\/australiantactical.com.au\/cdn\/shop\/files\/images_18_5055402d-cba2-41be-a021-e19c091b2982.jpg?v=1757627932"],"featured_image":"\/\/australiantactical.com.au\/cdn\/shop\/files\/Newdiestaxbushing_1080x_f7a45646-1d70-45ee-8002-c0600e3f4cea.png?v=1757627910","options":["Title"],"media":[{"alt":null,"id":30111546441867,"position":1,"preview_image":{"aspect_ratio":0.983,"height":1099,"width":1080,"src":"\/\/australiantactical.com.au\/cdn\/shop\/files\/Newdiestaxbushing_1080x_f7a45646-1d70-45ee-8002-c0600e3f4cea.png?v=1757627910"},"aspect_ratio":0.983,"height":1099,"media_type":"image","src":"\/\/australiantactical.com.au\/cdn\/shop\/files\/Newdiestaxbushing_1080x_f7a45646-1d70-45ee-8002-c0600e3f4cea.png?v=1757627910","width":1080},{"alt":null,"id":30111546998923,"position":2,"preview_image":{"aspect_ratio":0.979,"height":804,"width":787,"src":"\/\/australiantactical.com.au\/cdn\/shop\/files\/Screenshot2023-10-05105900_1080x_28f8f05d-b6c4-4306-bac5-7edb2871b99b.png?v=1757627920"},"aspect_ratio":0.979,"height":804,"media_type":"image","src":"\/\/australiantactical.com.au\/cdn\/shop\/files\/Screenshot2023-10-05105900_1080x_28f8f05d-b6c4-4306-bac5-7edb2871b99b.png?v=1757627920","width":787},{"alt":null,"id":30111547457675,"position":3,"preview_image":{"aspect_ratio":1.0,"height":554,"width":554,"src":"\/\/australiantactical.com.au\/cdn\/shop\/files\/images_17_5756778b-aaf9-488b-9a60-55fda2ef8da8.jpg?v=1757627924"},"aspect_ratio":1.0,"height":554,"media_type":"image","src":"\/\/australiantactical.com.au\/cdn\/shop\/files\/images_17_5756778b-aaf9-488b-9a60-55fda2ef8da8.jpg?v=1757627924","width":554},{"alt":null,"id":30111548440715,"position":4,"preview_image":{"aspect_ratio":1.003,"height":1500,"width":1504,"src":"\/\/australiantactical.com.au\/cdn\/shop\/files\/PhotoRoom_20231005_084349_774a1151-0063-491b-826c-78528f3caf65.jpg?v=1757627931"},"aspect_ratio":1.003,"height":1500,"media_type":"image","src":"\/\/australiantactical.com.au\/cdn\/shop\/files\/PhotoRoom_20231005_084349_774a1151-0063-491b-826c-78528f3caf65.jpg?v=1757627931","width":1504},{"alt":null,"id":30111548473483,"position":5,"preview_image":{"aspect_ratio":1.0,"height":554,"width":554,"src":"\/\/australiantactical.com.au\/cdn\/shop\/files\/images_18_5055402d-cba2-41be-a021-e19c091b2982.jpg?v=1757627932"},"aspect_ratio":1.0,"height":554,"media_type":"image","src":"\/\/australiantactical.com.au\/cdn\/shop\/files\/images_18_5055402d-cba2-41be-a021-e19c091b2982.jpg?v=1757627932","width":554}],"requires_selling_plan":false,"selling_plan_groups":[],"content":"\u003ch2 data-start=\"2581\" data-end=\"2602\"\u003eOBi Stax Bushing\u003c\/h2\u003e\n\u003cp data-start=\"2604\" data-end=\"2882\"\u003e\u003cstrong data-start=\"2604\" data-end=\"2638\"\u003eSmall parts, perfectly stored.\u003c\/strong\u003e\u003cbr data-start=\"2638\" data-end=\"2641\"\u003eThe \u003cstrong data-start=\"2645\" data-end=\"2665\"\u003eOBi Stax Bushing\u003c\/strong\u003e is purpose-built for the precision pieces that often go missing. It neatly holds \u003cstrong data-start=\"2747\" data-end=\"2827\"\u003etwo neck bushings, one expander ball, and up to two Allen keys or decap pins\u003c\/strong\u003e, keeping them visible and right where you need them.\u003c\/p\u003e\n\u003ch3 data-start=\"2884\" data-end=\"2898\"\u003eFeatures\u003c\/h3\u003e\n\u003cul data-start=\"2899\" data-end=\"3115\"\u003e\n\u003cli data-start=\"2899\" data-end=\"2969\"\u003e\n\u003cp data-start=\"2901\" data-end=\"2969\"\u003e\u003cstrong data-start=\"2901\" data-end=\"2922\"\u003eDedicated storage\u003c\/strong\u003e – Prevents small parts from being misplaced.\u003c\/p\u003e\n\u003c\/li\u003e\n\u003cli data-start=\"2970\" data-end=\"3046\"\u003e\n\u003cp data-start=\"2972\" data-end=\"3046\"\u003e\u003cstrong data-start=\"2972\" data-end=\"2988\"\u003eSystem ready\u003c\/strong\u003e – Mounts to the Stax Bar or sits on a bench with Drops.\u003c\/p\u003e\n\u003c\/li\u003e\n\u003cli data-start=\"3047\" data-end=\"3115\"\u003e\n\u003cp data-start=\"3049\" data-end=\"3115\"\u003e\u003cstrong data-start=\"3049\" data-end=\"3070\"\u003eCompact \u0026amp; modular\u003c\/strong\u003e – Fits seamlessly beside Blocks and Drops.\u003c\/p\u003e\n\u003c\/li\u003e\n\u003c\/ul\u003e\n\u003ch3 data-start=\"3117\" data-end=\"3135\"\u003eRequirements\u003c\/h3\u003e\n\u003cul data-start=\"3136\" data-end=\"3253\"\u003e\n\u003cli data-start=\"3136\" data-end=\"3199\"\u003e\n\u003cp data-start=\"3138\" data-end=\"3199\"\u003eAt least one \u003cstrong data-start=\"3151\" data-end=\"3163\"\u003eStax Bar\u003c\/strong\u003e is required to mount the Bushing.\u003c\/p\u003e\n\u003c\/li\u003e\n\u003cli data-start=\"3200\" data-end=\"3253\"\u003e\n\u003cp data-start=\"3202\" data-end=\"3253\"\u003e\u003cstrong data-start=\"3202\" data-end=\"3216\"\u003eStax Drops\u003c\/strong\u003e recommended for countertop setups.\u003c\/p\u003e\n\u003c\/li\u003e\n\u003c\/ul\u003e\n\u003ch3 data-start=\"3255\" data-end=\"3271\"\u003eIn the box\u003c\/h3\u003e\n\u003cul data-start=\"3272\" data-end=\"3342\"\u003e\n\u003cli data-start=\"3272\" data-end=\"3342\"\u003e\n\u003cp data-start=\"3274\" data-end=\"3342\"\u003e1 × \u003cstrong data-start=\"3278\" data-end=\"3298\"\u003eOBi Stax Bushing\u003c\/strong\u003e (Bar, Blocks, and Drops sold separately).\u003c\/p\u003e\n\u003c\/li\u003e\n\u003c\/ul\u003e"}
OBi Stax Bushing
Small parts, perfectly stored.
The OBi Stax Bushing is purpose-built for the precision pieces that often go missing. It neatly holds two neck bushings, one expander ball, and up to two Allen keys or decap pins, keeping them visible and right where you need them.
Features
-
Dedicated storage – Prevents small parts from being misplaced.
-
System ready – Mounts to the Stax Bar or sits on a bench with Drops.
-
Compact & modular – Fits seamlessly beside Blocks and Drops.
Requirements
-
At least one Stax Bar is required to mount the Bushing.
-
Stax Drops recommended for countertop setups.
In the box
-
1 × OBi Stax Bushing (Bar, Blocks, and Drops sold separately).
-
{"id":7902720393355,"title":"OBi Block 10","handle":"obi-block-10","description":"\u003ch2 data-start=\"1763\" data-end=\"1785\"\u003eOBi Stax Block 10\u003c\/h2\u003e\n\u003cp data-start=\"1787\" data-end=\"2119\"\u003e\u003cstrong data-start=\"1787\" data-end=\"1818\"\u003eRoom for serious reloaders.\u003c\/strong\u003e\u003cbr data-start=\"1818\" data-end=\"1821\"\u003eThe \u003cstrong data-start=\"1825\" data-end=\"1846\"\u003eOBi Stax Block 10\u003c\/strong\u003e is designed to handle larger die collections with space for up to \u003cstrong data-start=\"1913\" data-end=\"1934\"\u003e10 reloading dies\u003c\/strong\u003e plus accessories like Allen keys or decap pins. It connects directly to the Stax Bar or can rest on a countertop when paired with Stax Drops, keeping everything stable and organised.\u003c\/p\u003e\n\u003ch3 data-start=\"2121\" data-end=\"2135\"\u003eFeatures\u003c\/h3\u003e\n\u003cul data-start=\"2136\" data-end=\"2343\"\u003e\n\u003cli data-start=\"2136\" data-end=\"2198\"\u003e\n\u003cp data-start=\"2138\" data-end=\"2198\"\u003e\u003cstrong data-start=\"2138\" data-end=\"2155\"\u003eHigh capacity\u003c\/strong\u003e – Stores up to 10 dies plus accessories.\u003c\/p\u003e\n\u003c\/li\u003e\n\u003cli data-start=\"2199\" data-end=\"2271\"\u003e\n\u003cp data-start=\"2201\" data-end=\"2271\"\u003e\u003cstrong data-start=\"2201\" data-end=\"2216\"\u003eModular fit\u003c\/strong\u003e – Works with the Stax Bar and Drops for flexibility.\u003c\/p\u003e\n\u003c\/li\u003e\n\u003cli data-start=\"2272\" data-end=\"2343\"\u003e\n\u003cp data-start=\"2274\" data-end=\"2343\"\u003e\u003cstrong data-start=\"2274\" data-end=\"2294\"\u003eEfficient layout\u003c\/strong\u003e – Keeps your tools tidy and within easy reach.\u003c\/p\u003e\n\u003c\/li\u003e\n\u003c\/ul\u003e\n\u003ch3 data-start=\"2345\" data-end=\"2363\"\u003eRequirements\u003c\/h3\u003e\n\u003cul data-start=\"2364\" data-end=\"2479\"\u003e\n\u003cli data-start=\"2364\" data-end=\"2428\"\u003e\n\u003cp data-start=\"2366\" data-end=\"2428\"\u003eAt least one \u003cstrong data-start=\"2379\" data-end=\"2391\"\u003eStax Bar\u003c\/strong\u003e is required to mount the Block 10.\u003c\/p\u003e\n\u003c\/li\u003e\n\u003cli data-start=\"2429\" data-end=\"2479\"\u003e\n\u003cp data-start=\"2431\" data-end=\"2479\"\u003e\u003cstrong data-start=\"2431\" data-end=\"2445\"\u003eStax Drops\u003c\/strong\u003e recommended for countertop use.\u003c\/p\u003e\n\u003c\/li\u003e\n\u003c\/ul\u003e\n\u003ch3 data-start=\"2481\" data-end=\"2497\"\u003eIn the box\u003c\/h3\u003e\n\u003cul data-start=\"2498\" data-end=\"2574\"\u003e\n\u003cli data-start=\"2498\" data-end=\"2574\"\u003e\n\u003cp data-start=\"2500\" data-end=\"2574\"\u003e1 × \u003cstrong data-start=\"2504\" data-end=\"2525\"\u003eOBi Stax Block 10\u003c\/strong\u003e (Bar, Drops, and accessories sold separately).\u003c\/p\u003e\n\u003c\/li\u003e\n\u003c\/ul\u003e","published_at":"2025-09-12T08:05:30+10:00","created_at":"2025-09-12T07:55:24+10:00","vendor":"Australian Tactical","type":"","tags":["OBi","old balls inc","Reloading"],"price":19995,"price_min":19995,"price_max":19995,"available":true,"price_varies":false,"compare_at_price":null,"compare_at_price_min":0,"compare_at_price_max":0,"compare_at_price_varies":false,"variants":[{"id":43996325773451,"title":"Default Title","option1":"Default Title","option2":null,"option3":null,"sku":"StaxBar10","requires_shipping":true,"taxable":true,"featured_image":null,"available":true,"name":"OBi Block 10","public_title":null,"options":["Default Title"],"price":19995,"weight":1000,"compare_at_price":null,"inventory_management":"shopify","barcode":"","requires_selling_plan":false,"selling_plan_allocations":[]}],"images":["\/\/australiantactical.com.au\/cdn\/shop\/files\/NewDiestax10_1400x_f5cab621-4145-427e-bf1b-96977d8eb94c.jpg?v=1757627634","\/\/australiantactical.com.au\/cdn\/shop\/files\/images_17_34acf5bf-b42c-4474-90be-e4b0fece0c0d.jpg?v=1757627637","\/\/australiantactical.com.au\/cdn\/shop\/files\/images_18_2f34bef2-f369-4045-968d-ccbca415cd97.jpg?v=1757627639"],"featured_image":"\/\/australiantactical.com.au\/cdn\/shop\/files\/NewDiestax10_1400x_f5cab621-4145-427e-bf1b-96977d8eb94c.jpg?v=1757627634","options":["Title"],"media":[{"alt":null,"id":30111509446795,"position":1,"preview_image":{"aspect_ratio":1.0,"height":1400,"width":1400,"src":"\/\/australiantactical.com.au\/cdn\/shop\/files\/NewDiestax10_1400x_f5cab621-4145-427e-bf1b-96977d8eb94c.jpg?v=1757627634"},"aspect_ratio":1.0,"height":1400,"media_type":"image","src":"\/\/australiantactical.com.au\/cdn\/shop\/files\/NewDiestax10_1400x_f5cab621-4145-427e-bf1b-96977d8eb94c.jpg?v=1757627634","width":1400},{"alt":null,"id":30111509741707,"position":2,"preview_image":{"aspect_ratio":1.0,"height":554,"width":554,"src":"\/\/australiantactical.com.au\/cdn\/shop\/files\/images_17_34acf5bf-b42c-4474-90be-e4b0fece0c0d.jpg?v=1757627637"},"aspect_ratio":1.0,"height":554,"media_type":"image","src":"\/\/australiantactical.com.au\/cdn\/shop\/files\/images_17_34acf5bf-b42c-4474-90be-e4b0fece0c0d.jpg?v=1757627637","width":554},{"alt":null,"id":30111509840011,"position":3,"preview_image":{"aspect_ratio":1.0,"height":554,"width":554,"src":"\/\/australiantactical.com.au\/cdn\/shop\/files\/images_18_2f34bef2-f369-4045-968d-ccbca415cd97.jpg?v=1757627639"},"aspect_ratio":1.0,"height":554,"media_type":"image","src":"\/\/australiantactical.com.au\/cdn\/shop\/files\/images_18_2f34bef2-f369-4045-968d-ccbca415cd97.jpg?v=1757627639","width":554}],"requires_selling_plan":false,"selling_plan_groups":[],"content":"\u003ch2 data-start=\"1763\" data-end=\"1785\"\u003eOBi Stax Block 10\u003c\/h2\u003e\n\u003cp data-start=\"1787\" data-end=\"2119\"\u003e\u003cstrong data-start=\"1787\" data-end=\"1818\"\u003eRoom for serious reloaders.\u003c\/strong\u003e\u003cbr data-start=\"1818\" data-end=\"1821\"\u003eThe \u003cstrong data-start=\"1825\" data-end=\"1846\"\u003eOBi Stax Block 10\u003c\/strong\u003e is designed to handle larger die collections with space for up to \u003cstrong data-start=\"1913\" data-end=\"1934\"\u003e10 reloading dies\u003c\/strong\u003e plus accessories like Allen keys or decap pins. It connects directly to the Stax Bar or can rest on a countertop when paired with Stax Drops, keeping everything stable and organised.\u003c\/p\u003e\n\u003ch3 data-start=\"2121\" data-end=\"2135\"\u003eFeatures\u003c\/h3\u003e\n\u003cul data-start=\"2136\" data-end=\"2343\"\u003e\n\u003cli data-start=\"2136\" data-end=\"2198\"\u003e\n\u003cp data-start=\"2138\" data-end=\"2198\"\u003e\u003cstrong data-start=\"2138\" data-end=\"2155\"\u003eHigh capacity\u003c\/strong\u003e – Stores up to 10 dies plus accessories.\u003c\/p\u003e\n\u003c\/li\u003e\n\u003cli data-start=\"2199\" data-end=\"2271\"\u003e\n\u003cp data-start=\"2201\" data-end=\"2271\"\u003e\u003cstrong data-start=\"2201\" data-end=\"2216\"\u003eModular fit\u003c\/strong\u003e – Works with the Stax Bar and Drops for flexibility.\u003c\/p\u003e\n\u003c\/li\u003e\n\u003cli data-start=\"2272\" data-end=\"2343\"\u003e\n\u003cp data-start=\"2274\" data-end=\"2343\"\u003e\u003cstrong data-start=\"2274\" data-end=\"2294\"\u003eEfficient layout\u003c\/strong\u003e – Keeps your tools tidy and within easy reach.\u003c\/p\u003e\n\u003c\/li\u003e\n\u003c\/ul\u003e\n\u003ch3 data-start=\"2345\" data-end=\"2363\"\u003eRequirements\u003c\/h3\u003e\n\u003cul data-start=\"2364\" data-end=\"2479\"\u003e\n\u003cli data-start=\"2364\" data-end=\"2428\"\u003e\n\u003cp data-start=\"2366\" data-end=\"2428\"\u003eAt least one \u003cstrong data-start=\"2379\" data-end=\"2391\"\u003eStax Bar\u003c\/strong\u003e is required to mount the Block 10.\u003c\/p\u003e\n\u003c\/li\u003e\n\u003cli data-start=\"2429\" data-end=\"2479\"\u003e\n\u003cp data-start=\"2431\" data-end=\"2479\"\u003e\u003cstrong data-start=\"2431\" data-end=\"2445\"\u003eStax Drops\u003c\/strong\u003e recommended for countertop use.\u003c\/p\u003e\n\u003c\/li\u003e\n\u003c\/ul\u003e\n\u003ch3 data-start=\"2481\" data-end=\"2497\"\u003eIn the box\u003c\/h3\u003e\n\u003cul data-start=\"2498\" data-end=\"2574\"\u003e\n\u003cli data-start=\"2498\" data-end=\"2574\"\u003e\n\u003cp data-start=\"2500\" data-end=\"2574\"\u003e1 × \u003cstrong data-start=\"2504\" data-end=\"2525\"\u003eOBi Stax Block 10\u003c\/strong\u003e (Bar, Drops, and accessories sold separately).\u003c\/p\u003e\n\u003c\/li\u003e\n\u003c\/ul\u003e"}
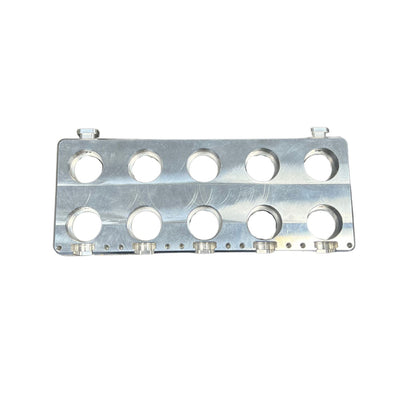
OBi Stax Block 10
Room for serious reloaders.
The OBi Stax Block 10 is designed to handle larger die collections with space for up to 10 reloading dies plus accessories like Allen keys or decap pins. It connects directly to the Stax Bar or can rest on a countertop when paired with Stax Drops, keeping everything stable and organised.
Features
-
High capacity – Stores up to 10 dies plus accessories.
-
Modular fit – Works with the Stax Bar and Drops for flexibility.
-
Efficient layout – Keeps your tools tidy and within easy reach.
Requirements
-
At least one Stax Bar is required to mount the Block 10.
-
Stax Drops recommended for countertop use.
In the box
-
1 × OBi Stax Block 10 (Bar, Drops, and accessories sold separately).
-
{"id":7902720393355,"title":"OBi Block 10","handle":"obi-block-10","description":"\u003ch2 data-start=\"1763\" data-end=\"1785\"\u003eOBi Stax Block 10\u003c\/h2\u003e\n\u003cp data-start=\"1787\" data-end=\"2119\"\u003e\u003cstrong data-start=\"1787\" data-end=\"1818\"\u003eRoom for serious reloaders.\u003c\/strong\u003e\u003cbr data-start=\"1818\" data-end=\"1821\"\u003eThe \u003cstrong data-start=\"1825\" data-end=\"1846\"\u003eOBi Stax Block 10\u003c\/strong\u003e is designed to handle larger die collections with space for up to \u003cstrong data-start=\"1913\" data-end=\"1934\"\u003e10 reloading dies\u003c\/strong\u003e plus accessories like Allen keys or decap pins. It connects directly to the Stax Bar or can rest on a countertop when paired with Stax Drops, keeping everything stable and organised.\u003c\/p\u003e\n\u003ch3 data-start=\"2121\" data-end=\"2135\"\u003eFeatures\u003c\/h3\u003e\n\u003cul data-start=\"2136\" data-end=\"2343\"\u003e\n\u003cli data-start=\"2136\" data-end=\"2198\"\u003e\n\u003cp data-start=\"2138\" data-end=\"2198\"\u003e\u003cstrong data-start=\"2138\" data-end=\"2155\"\u003eHigh capacity\u003c\/strong\u003e – Stores up to 10 dies plus accessories.\u003c\/p\u003e\n\u003c\/li\u003e\n\u003cli data-start=\"2199\" data-end=\"2271\"\u003e\n\u003cp data-start=\"2201\" data-end=\"2271\"\u003e\u003cstrong data-start=\"2201\" data-end=\"2216\"\u003eModular fit\u003c\/strong\u003e – Works with the Stax Bar and Drops for flexibility.\u003c\/p\u003e\n\u003c\/li\u003e\n\u003cli data-start=\"2272\" data-end=\"2343\"\u003e\n\u003cp data-start=\"2274\" data-end=\"2343\"\u003e\u003cstrong data-start=\"2274\" data-end=\"2294\"\u003eEfficient layout\u003c\/strong\u003e – Keeps your tools tidy and within easy reach.\u003c\/p\u003e\n\u003c\/li\u003e\n\u003c\/ul\u003e\n\u003ch3 data-start=\"2345\" data-end=\"2363\"\u003eRequirements\u003c\/h3\u003e\n\u003cul data-start=\"2364\" data-end=\"2479\"\u003e\n\u003cli data-start=\"2364\" data-end=\"2428\"\u003e\n\u003cp data-start=\"2366\" data-end=\"2428\"\u003eAt least one \u003cstrong data-start=\"2379\" data-end=\"2391\"\u003eStax Bar\u003c\/strong\u003e is required to mount the Block 10.\u003c\/p\u003e\n\u003c\/li\u003e\n\u003cli data-start=\"2429\" data-end=\"2479\"\u003e\n\u003cp data-start=\"2431\" data-end=\"2479\"\u003e\u003cstrong data-start=\"2431\" data-end=\"2445\"\u003eStax Drops\u003c\/strong\u003e recommended for countertop use.\u003c\/p\u003e\n\u003c\/li\u003e\n\u003c\/ul\u003e\n\u003ch3 data-start=\"2481\" data-end=\"2497\"\u003eIn the box\u003c\/h3\u003e\n\u003cul data-start=\"2498\" data-end=\"2574\"\u003e\n\u003cli data-start=\"2498\" data-end=\"2574\"\u003e\n\u003cp data-start=\"2500\" data-end=\"2574\"\u003e1 × \u003cstrong data-start=\"2504\" data-end=\"2525\"\u003eOBi Stax Block 10\u003c\/strong\u003e (Bar, Drops, and accessories sold separately).\u003c\/p\u003e\n\u003c\/li\u003e\n\u003c\/ul\u003e","published_at":"2025-09-12T08:05:30+10:00","created_at":"2025-09-12T07:55:24+10:00","vendor":"Australian Tactical","type":"","tags":["OBi","old balls inc","Reloading"],"price":19995,"price_min":19995,"price_max":19995,"available":true,"price_varies":false,"compare_at_price":null,"compare_at_price_min":0,"compare_at_price_max":0,"compare_at_price_varies":false,"variants":[{"id":43996325773451,"title":"Default Title","option1":"Default Title","option2":null,"option3":null,"sku":"StaxBar10","requires_shipping":true,"taxable":true,"featured_image":null,"available":true,"name":"OBi Block 10","public_title":null,"options":["Default Title"],"price":19995,"weight":1000,"compare_at_price":null,"inventory_management":"shopify","barcode":"","requires_selling_plan":false,"selling_plan_allocations":[]}],"images":["\/\/australiantactical.com.au\/cdn\/shop\/files\/NewDiestax10_1400x_f5cab621-4145-427e-bf1b-96977d8eb94c.jpg?v=1757627634","\/\/australiantactical.com.au\/cdn\/shop\/files\/images_17_34acf5bf-b42c-4474-90be-e4b0fece0c0d.jpg?v=1757627637","\/\/australiantactical.com.au\/cdn\/shop\/files\/images_18_2f34bef2-f369-4045-968d-ccbca415cd97.jpg?v=1757627639"],"featured_image":"\/\/australiantactical.com.au\/cdn\/shop\/files\/NewDiestax10_1400x_f5cab621-4145-427e-bf1b-96977d8eb94c.jpg?v=1757627634","options":["Title"],"media":[{"alt":null,"id":30111509446795,"position":1,"preview_image":{"aspect_ratio":1.0,"height":1400,"width":1400,"src":"\/\/australiantactical.com.au\/cdn\/shop\/files\/NewDiestax10_1400x_f5cab621-4145-427e-bf1b-96977d8eb94c.jpg?v=1757627634"},"aspect_ratio":1.0,"height":1400,"media_type":"image","src":"\/\/australiantactical.com.au\/cdn\/shop\/files\/NewDiestax10_1400x_f5cab621-4145-427e-bf1b-96977d8eb94c.jpg?v=1757627634","width":1400},{"alt":null,"id":30111509741707,"position":2,"preview_image":{"aspect_ratio":1.0,"height":554,"width":554,"src":"\/\/australiantactical.com.au\/cdn\/shop\/files\/images_17_34acf5bf-b42c-4474-90be-e4b0fece0c0d.jpg?v=1757627637"},"aspect_ratio":1.0,"height":554,"media_type":"image","src":"\/\/australiantactical.com.au\/cdn\/shop\/files\/images_17_34acf5bf-b42c-4474-90be-e4b0fece0c0d.jpg?v=1757627637","width":554},{"alt":null,"id":30111509840011,"position":3,"preview_image":{"aspect_ratio":1.0,"height":554,"width":554,"src":"\/\/australiantactical.com.au\/cdn\/shop\/files\/images_18_2f34bef2-f369-4045-968d-ccbca415cd97.jpg?v=1757627639"},"aspect_ratio":1.0,"height":554,"media_type":"image","src":"\/\/australiantactical.com.au\/cdn\/shop\/files\/images_18_2f34bef2-f369-4045-968d-ccbca415cd97.jpg?v=1757627639","width":554}],"requires_selling_plan":false,"selling_plan_groups":[],"content":"\u003ch2 data-start=\"1763\" data-end=\"1785\"\u003eOBi Stax Block 10\u003c\/h2\u003e\n\u003cp data-start=\"1787\" data-end=\"2119\"\u003e\u003cstrong data-start=\"1787\" data-end=\"1818\"\u003eRoom for serious reloaders.\u003c\/strong\u003e\u003cbr data-start=\"1818\" data-end=\"1821\"\u003eThe \u003cstrong data-start=\"1825\" data-end=\"1846\"\u003eOBi Stax Block 10\u003c\/strong\u003e is designed to handle larger die collections with space for up to \u003cstrong data-start=\"1913\" data-end=\"1934\"\u003e10 reloading dies\u003c\/strong\u003e plus accessories like Allen keys or decap pins. It connects directly to the Stax Bar or can rest on a countertop when paired with Stax Drops, keeping everything stable and organised.\u003c\/p\u003e\n\u003ch3 data-start=\"2121\" data-end=\"2135\"\u003eFeatures\u003c\/h3\u003e\n\u003cul data-start=\"2136\" data-end=\"2343\"\u003e\n\u003cli data-start=\"2136\" data-end=\"2198\"\u003e\n\u003cp data-start=\"2138\" data-end=\"2198\"\u003e\u003cstrong data-start=\"2138\" data-end=\"2155\"\u003eHigh capacity\u003c\/strong\u003e – Stores up to 10 dies plus accessories.\u003c\/p\u003e\n\u003c\/li\u003e\n\u003cli data-start=\"2199\" data-end=\"2271\"\u003e\n\u003cp data-start=\"2201\" data-end=\"2271\"\u003e\u003cstrong data-start=\"2201\" data-end=\"2216\"\u003eModular fit\u003c\/strong\u003e – Works with the Stax Bar and Drops for flexibility.\u003c\/p\u003e\n\u003c\/li\u003e\n\u003cli data-start=\"2272\" data-end=\"2343\"\u003e\n\u003cp data-start=\"2274\" data-end=\"2343\"\u003e\u003cstrong data-start=\"2274\" data-end=\"2294\"\u003eEfficient layout\u003c\/strong\u003e – Keeps your tools tidy and within easy reach.\u003c\/p\u003e\n\u003c\/li\u003e\n\u003c\/ul\u003e\n\u003ch3 data-start=\"2345\" data-end=\"2363\"\u003eRequirements\u003c\/h3\u003e\n\u003cul data-start=\"2364\" data-end=\"2479\"\u003e\n\u003cli data-start=\"2364\" data-end=\"2428\"\u003e\n\u003cp data-start=\"2366\" data-end=\"2428\"\u003eAt least one \u003cstrong data-start=\"2379\" data-end=\"2391\"\u003eStax Bar\u003c\/strong\u003e is required to mount the Block 10.\u003c\/p\u003e\n\u003c\/li\u003e\n\u003cli data-start=\"2429\" data-end=\"2479\"\u003e\n\u003cp data-start=\"2431\" data-end=\"2479\"\u003e\u003cstrong data-start=\"2431\" data-end=\"2445\"\u003eStax Drops\u003c\/strong\u003e recommended for countertop use.\u003c\/p\u003e\n\u003c\/li\u003e\n\u003c\/ul\u003e\n\u003ch3 data-start=\"2481\" data-end=\"2497\"\u003eIn the box\u003c\/h3\u003e\n\u003cul data-start=\"2498\" data-end=\"2574\"\u003e\n\u003cli data-start=\"2498\" data-end=\"2574\"\u003e\n\u003cp data-start=\"2500\" data-end=\"2574\"\u003e1 × \u003cstrong data-start=\"2504\" data-end=\"2525\"\u003eOBi Stax Block 10\u003c\/strong\u003e (Bar, Drops, and accessories sold separately).\u003c\/p\u003e\n\u003c\/li\u003e\n\u003c\/ul\u003e"}
OBi Stax Block 10
Room for serious reloaders.
The OBi Stax Block 10 is designed to handle larger die collections with space for up to 10 reloading dies plus accessories like Allen keys or decap pins. It connects directly to the Stax Bar or can rest on a countertop when paired with Stax Drops, keeping everything stable and organised.
Features
-
High capacity – Stores up to 10 dies plus accessories.
-
Modular fit – Works with the Stax Bar and Drops for flexibility.
-
Efficient layout – Keeps your tools tidy and within easy reach.
Requirements
-
At least one Stax Bar is required to mount the Block 10.
-
Stax Drops recommended for countertop use.
In the box
-
1 × OBi Stax Block 10 (Bar, Drops, and accessories sold separately).
-
{"id":7902724456587,"title":"OBi Stax Block","handle":"obi-stax-block","description":"\u003ch2 data-start=\"1057\" data-end=\"1076\"\u003eOBi Stax Block\u003c\/h2\u003e\n\u003cp data-start=\"1078\" data-end=\"1349\"\u003e\u003cstrong data-start=\"1078\" data-end=\"1112\"\u003eThe heart of die organisation.\u003c\/strong\u003e\u003cbr data-start=\"1112\" data-end=\"1115\"\u003eThe \u003cstrong data-start=\"1119\" data-end=\"1137\"\u003eOBi Stax Block\u003c\/strong\u003e is the core module of the system, holding your reloading dies neatly in place. Each Block connects to the Stax Bar and can be combined with other Blocks, Bushings, or Drops for a clean and modular bench setup.\u003c\/p\u003e\n\u003ch3 data-start=\"1351\" data-end=\"1365\"\u003eFeatures\u003c\/h3\u003e\n\u003cul data-start=\"1366\" data-end=\"1585\"\u003e\n\u003cli data-start=\"1366\" data-end=\"1437\"\u003e\n\u003cp data-start=\"1368\" data-end=\"1437\"\u003e\u003cstrong data-start=\"1368\" data-end=\"1386\"\u003eSecure storage\u003c\/strong\u003e – Keeps dies aligned, visible, and ready to use.\u003c\/p\u003e\n\u003c\/li\u003e\n\u003cli data-start=\"1438\" data-end=\"1509\"\u003e\n\u003cp data-start=\"1440\" data-end=\"1509\"\u003e\u003cstrong data-start=\"1440\" data-end=\"1461\"\u003eSystem compatible\u003c\/strong\u003e – Connects to the Stax Bar and scales easily.\u003c\/p\u003e\n\u003c\/li\u003e\n\u003cli data-start=\"1510\" data-end=\"1585\"\u003e\n\u003cp data-start=\"1512\" data-end=\"1585\"\u003e\u003cstrong data-start=\"1512\" data-end=\"1530\"\u003eCompact design\u003c\/strong\u003e – Takes up minimal space while adding maximum order.\u003c\/p\u003e\n\u003c\/li\u003e\n\u003c\/ul\u003e\n\u003ch3 data-start=\"1587\" data-end=\"1605\"\u003eRequirements\u003c\/h3\u003e\n\u003cul data-start=\"1606\" data-end=\"1667\"\u003e\n\u003cli data-start=\"1606\" data-end=\"1667\"\u003e\n\u003cp data-start=\"1608\" data-end=\"1667\"\u003eAt least one \u003cstrong data-start=\"1621\" data-end=\"1633\"\u003eStax Bar\u003c\/strong\u003e is required to mount the Block.\u003c\/p\u003e\n\u003c\/li\u003e\n\u003c\/ul\u003e\n\u003ch3 data-start=\"1669\" data-end=\"1685\"\u003eIn the box\u003c\/h3\u003e\n\u003cul data-start=\"1686\" data-end=\"1756\"\u003e\n\u003cli data-start=\"1686\" data-end=\"1756\"\u003e\n\u003cp data-start=\"1688\" data-end=\"1756\"\u003e1 × \u003cstrong data-start=\"1692\" data-end=\"1710\"\u003eOBi Stax Block\u003c\/strong\u003e (Bar, Bushings, and Drops sold separately).\u003c\/p\u003e\n\u003c\/li\u003e\n\u003c\/ul\u003e","published_at":"2025-09-12T08:05:31+10:00","created_at":"2025-09-12T08:01:01+10:00","vendor":"Australian Tactical","type":"","tags":["OBi","old balls inc","Reloading"],"price":6995,"price_min":6995,"price_max":6995,"available":true,"price_varies":false,"compare_at_price":null,"compare_at_price_min":0,"compare_at_price_max":0,"compare_at_price_varies":false,"variants":[{"id":43996334653579,"title":"Default Title","option1":"Default Title","option2":null,"option3":null,"sku":"StaxBlock","requires_shipping":true,"taxable":true,"featured_image":null,"available":true,"name":"OBi Stax Block","public_title":null,"options":["Default Title"],"price":6995,"weight":1000,"compare_at_price":null,"inventory_management":"shopify","barcode":"","requires_selling_plan":false,"selling_plan_allocations":[]}],"images":["\/\/australiantactical.com.au\/cdn\/shop\/files\/NewDiestax_1080x_9a6e32cb-2f10-4c48-8a41-9d5a9dab8fca.jpg?v=1757628003","\/\/australiantactical.com.au\/cdn\/shop\/files\/images_17_cbc11851-5926-40d6-89b2-3a9b910d59cf.jpg?v=1757628015","\/\/australiantactical.com.au\/cdn\/shop\/files\/images_18_f59b3d49-363f-43ed-b813-ad429258a196.jpg?v=1757628015","\/\/australiantactical.com.au\/cdn\/shop\/files\/PhotoRoom_20231005_084349_d473ebb8-75bf-47a0-b2d4-0e2ddf9a3da3.jpg?v=1757628015"],"featured_image":"\/\/australiantactical.com.au\/cdn\/shop\/files\/NewDiestax_1080x_9a6e32cb-2f10-4c48-8a41-9d5a9dab8fca.jpg?v=1757628003","options":["Title"],"media":[{"alt":null,"id":30111553355915,"position":1,"preview_image":{"aspect_ratio":1.0,"height":1080,"width":1080,"src":"\/\/australiantactical.com.au\/cdn\/shop\/files\/NewDiestax_1080x_9a6e32cb-2f10-4c48-8a41-9d5a9dab8fca.jpg?v=1757628003"},"aspect_ratio":1.0,"height":1080,"media_type":"image","src":"\/\/australiantactical.com.au\/cdn\/shop\/files\/NewDiestax_1080x_9a6e32cb-2f10-4c48-8a41-9d5a9dab8fca.jpg?v=1757628003","width":1080},{"alt":null,"id":30111554306187,"position":2,"preview_image":{"aspect_ratio":1.0,"height":554,"width":554,"src":"\/\/australiantactical.com.au\/cdn\/shop\/files\/images_17_cbc11851-5926-40d6-89b2-3a9b910d59cf.jpg?v=1757628015"},"aspect_ratio":1.0,"height":554,"media_type":"image","src":"\/\/australiantactical.com.au\/cdn\/shop\/files\/images_17_cbc11851-5926-40d6-89b2-3a9b910d59cf.jpg?v=1757628015","width":554},{"alt":null,"id":30111554338955,"position":3,"preview_image":{"aspect_ratio":1.0,"height":554,"width":554,"src":"\/\/australiantactical.com.au\/cdn\/shop\/files\/images_18_f59b3d49-363f-43ed-b813-ad429258a196.jpg?v=1757628015"},"aspect_ratio":1.0,"height":554,"media_type":"image","src":"\/\/australiantactical.com.au\/cdn\/shop\/files\/images_18_f59b3d49-363f-43ed-b813-ad429258a196.jpg?v=1757628015","width":554},{"alt":null,"id":30111554371723,"position":4,"preview_image":{"aspect_ratio":1.003,"height":1500,"width":1504,"src":"\/\/australiantactical.com.au\/cdn\/shop\/files\/PhotoRoom_20231005_084349_d473ebb8-75bf-47a0-b2d4-0e2ddf9a3da3.jpg?v=1757628015"},"aspect_ratio":1.003,"height":1500,"media_type":"image","src":"\/\/australiantactical.com.au\/cdn\/shop\/files\/PhotoRoom_20231005_084349_d473ebb8-75bf-47a0-b2d4-0e2ddf9a3da3.jpg?v=1757628015","width":1504}],"requires_selling_plan":false,"selling_plan_groups":[],"content":"\u003ch2 data-start=\"1057\" data-end=\"1076\"\u003eOBi Stax Block\u003c\/h2\u003e\n\u003cp data-start=\"1078\" data-end=\"1349\"\u003e\u003cstrong data-start=\"1078\" data-end=\"1112\"\u003eThe heart of die organisation.\u003c\/strong\u003e\u003cbr data-start=\"1112\" data-end=\"1115\"\u003eThe \u003cstrong data-start=\"1119\" data-end=\"1137\"\u003eOBi Stax Block\u003c\/strong\u003e is the core module of the system, holding your reloading dies neatly in place. Each Block connects to the Stax Bar and can be combined with other Blocks, Bushings, or Drops for a clean and modular bench setup.\u003c\/p\u003e\n\u003ch3 data-start=\"1351\" data-end=\"1365\"\u003eFeatures\u003c\/h3\u003e\n\u003cul data-start=\"1366\" data-end=\"1585\"\u003e\n\u003cli data-start=\"1366\" data-end=\"1437\"\u003e\n\u003cp data-start=\"1368\" data-end=\"1437\"\u003e\u003cstrong data-start=\"1368\" data-end=\"1386\"\u003eSecure storage\u003c\/strong\u003e – Keeps dies aligned, visible, and ready to use.\u003c\/p\u003e\n\u003c\/li\u003e\n\u003cli data-start=\"1438\" data-end=\"1509\"\u003e\n\u003cp data-start=\"1440\" data-end=\"1509\"\u003e\u003cstrong data-start=\"1440\" data-end=\"1461\"\u003eSystem compatible\u003c\/strong\u003e – Connects to the Stax Bar and scales easily.\u003c\/p\u003e\n\u003c\/li\u003e\n\u003cli data-start=\"1510\" data-end=\"1585\"\u003e\n\u003cp data-start=\"1512\" data-end=\"1585\"\u003e\u003cstrong data-start=\"1512\" data-end=\"1530\"\u003eCompact design\u003c\/strong\u003e – Takes up minimal space while adding maximum order.\u003c\/p\u003e\n\u003c\/li\u003e\n\u003c\/ul\u003e\n\u003ch3 data-start=\"1587\" data-end=\"1605\"\u003eRequirements\u003c\/h3\u003e\n\u003cul data-start=\"1606\" data-end=\"1667\"\u003e\n\u003cli data-start=\"1606\" data-end=\"1667\"\u003e\n\u003cp data-start=\"1608\" data-end=\"1667\"\u003eAt least one \u003cstrong data-start=\"1621\" data-end=\"1633\"\u003eStax Bar\u003c\/strong\u003e is required to mount the Block.\u003c\/p\u003e\n\u003c\/li\u003e\n\u003c\/ul\u003e\n\u003ch3 data-start=\"1669\" data-end=\"1685\"\u003eIn the box\u003c\/h3\u003e\n\u003cul data-start=\"1686\" data-end=\"1756\"\u003e\n\u003cli data-start=\"1686\" data-end=\"1756\"\u003e\n\u003cp data-start=\"1688\" data-end=\"1756\"\u003e1 × \u003cstrong data-start=\"1692\" data-end=\"1710\"\u003eOBi Stax Block\u003c\/strong\u003e (Bar, Bushings, and Drops sold separately).\u003c\/p\u003e\n\u003c\/li\u003e\n\u003c\/ul\u003e"}
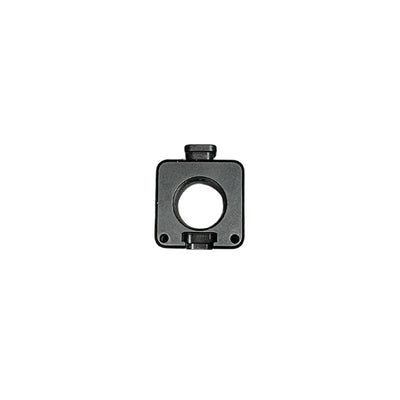
OBi Stax Block
The heart of die organisation.
The OBi Stax Block is the core module of the system, holding your reloading dies neatly in place. Each Block connects to the Stax Bar and can be combined with other Blocks, Bushings, or Drops for a clean and modular bench setup.
Features
-
Secure storage – Keeps dies aligned, visible, and ready to use.
-
System compatible – Connects to the Stax Bar and scales easily.
-
Compact design – Takes up minimal space while adding maximum order.
Requirements
-
At least one Stax Bar is required to mount the Block.
In the box
-
1 × OBi Stax Block (Bar, Bushings, and Drops sold separately).
-
{"id":7902724456587,"title":"OBi Stax Block","handle":"obi-stax-block","description":"\u003ch2 data-start=\"1057\" data-end=\"1076\"\u003eOBi Stax Block\u003c\/h2\u003e\n\u003cp data-start=\"1078\" data-end=\"1349\"\u003e\u003cstrong data-start=\"1078\" data-end=\"1112\"\u003eThe heart of die organisation.\u003c\/strong\u003e\u003cbr data-start=\"1112\" data-end=\"1115\"\u003eThe \u003cstrong data-start=\"1119\" data-end=\"1137\"\u003eOBi Stax Block\u003c\/strong\u003e is the core module of the system, holding your reloading dies neatly in place. Each Block connects to the Stax Bar and can be combined with other Blocks, Bushings, or Drops for a clean and modular bench setup.\u003c\/p\u003e\n\u003ch3 data-start=\"1351\" data-end=\"1365\"\u003eFeatures\u003c\/h3\u003e\n\u003cul data-start=\"1366\" data-end=\"1585\"\u003e\n\u003cli data-start=\"1366\" data-end=\"1437\"\u003e\n\u003cp data-start=\"1368\" data-end=\"1437\"\u003e\u003cstrong data-start=\"1368\" data-end=\"1386\"\u003eSecure storage\u003c\/strong\u003e – Keeps dies aligned, visible, and ready to use.\u003c\/p\u003e\n\u003c\/li\u003e\n\u003cli data-start=\"1438\" data-end=\"1509\"\u003e\n\u003cp data-start=\"1440\" data-end=\"1509\"\u003e\u003cstrong data-start=\"1440\" data-end=\"1461\"\u003eSystem compatible\u003c\/strong\u003e – Connects to the Stax Bar and scales easily.\u003c\/p\u003e\n\u003c\/li\u003e\n\u003cli data-start=\"1510\" data-end=\"1585\"\u003e\n\u003cp data-start=\"1512\" data-end=\"1585\"\u003e\u003cstrong data-start=\"1512\" data-end=\"1530\"\u003eCompact design\u003c\/strong\u003e – Takes up minimal space while adding maximum order.\u003c\/p\u003e\n\u003c\/li\u003e\n\u003c\/ul\u003e\n\u003ch3 data-start=\"1587\" data-end=\"1605\"\u003eRequirements\u003c\/h3\u003e\n\u003cul data-start=\"1606\" data-end=\"1667\"\u003e\n\u003cli data-start=\"1606\" data-end=\"1667\"\u003e\n\u003cp data-start=\"1608\" data-end=\"1667\"\u003eAt least one \u003cstrong data-start=\"1621\" data-end=\"1633\"\u003eStax Bar\u003c\/strong\u003e is required to mount the Block.\u003c\/p\u003e\n\u003c\/li\u003e\n\u003c\/ul\u003e\n\u003ch3 data-start=\"1669\" data-end=\"1685\"\u003eIn the box\u003c\/h3\u003e\n\u003cul data-start=\"1686\" data-end=\"1756\"\u003e\n\u003cli data-start=\"1686\" data-end=\"1756\"\u003e\n\u003cp data-start=\"1688\" data-end=\"1756\"\u003e1 × \u003cstrong data-start=\"1692\" data-end=\"1710\"\u003eOBi Stax Block\u003c\/strong\u003e (Bar, Bushings, and Drops sold separately).\u003c\/p\u003e\n\u003c\/li\u003e\n\u003c\/ul\u003e","published_at":"2025-09-12T08:05:31+10:00","created_at":"2025-09-12T08:01:01+10:00","vendor":"Australian Tactical","type":"","tags":["OBi","old balls inc","Reloading"],"price":6995,"price_min":6995,"price_max":6995,"available":true,"price_varies":false,"compare_at_price":null,"compare_at_price_min":0,"compare_at_price_max":0,"compare_at_price_varies":false,"variants":[{"id":43996334653579,"title":"Default Title","option1":"Default Title","option2":null,"option3":null,"sku":"StaxBlock","requires_shipping":true,"taxable":true,"featured_image":null,"available":true,"name":"OBi Stax Block","public_title":null,"options":["Default Title"],"price":6995,"weight":1000,"compare_at_price":null,"inventory_management":"shopify","barcode":"","requires_selling_plan":false,"selling_plan_allocations":[]}],"images":["\/\/australiantactical.com.au\/cdn\/shop\/files\/NewDiestax_1080x_9a6e32cb-2f10-4c48-8a41-9d5a9dab8fca.jpg?v=1757628003","\/\/australiantactical.com.au\/cdn\/shop\/files\/images_17_cbc11851-5926-40d6-89b2-3a9b910d59cf.jpg?v=1757628015","\/\/australiantactical.com.au\/cdn\/shop\/files\/images_18_f59b3d49-363f-43ed-b813-ad429258a196.jpg?v=1757628015","\/\/australiantactical.com.au\/cdn\/shop\/files\/PhotoRoom_20231005_084349_d473ebb8-75bf-47a0-b2d4-0e2ddf9a3da3.jpg?v=1757628015"],"featured_image":"\/\/australiantactical.com.au\/cdn\/shop\/files\/NewDiestax_1080x_9a6e32cb-2f10-4c48-8a41-9d5a9dab8fca.jpg?v=1757628003","options":["Title"],"media":[{"alt":null,"id":30111553355915,"position":1,"preview_image":{"aspect_ratio":1.0,"height":1080,"width":1080,"src":"\/\/australiantactical.com.au\/cdn\/shop\/files\/NewDiestax_1080x_9a6e32cb-2f10-4c48-8a41-9d5a9dab8fca.jpg?v=1757628003"},"aspect_ratio":1.0,"height":1080,"media_type":"image","src":"\/\/australiantactical.com.au\/cdn\/shop\/files\/NewDiestax_1080x_9a6e32cb-2f10-4c48-8a41-9d5a9dab8fca.jpg?v=1757628003","width":1080},{"alt":null,"id":30111554306187,"position":2,"preview_image":{"aspect_ratio":1.0,"height":554,"width":554,"src":"\/\/australiantactical.com.au\/cdn\/shop\/files\/images_17_cbc11851-5926-40d6-89b2-3a9b910d59cf.jpg?v=1757628015"},"aspect_ratio":1.0,"height":554,"media_type":"image","src":"\/\/australiantactical.com.au\/cdn\/shop\/files\/images_17_cbc11851-5926-40d6-89b2-3a9b910d59cf.jpg?v=1757628015","width":554},{"alt":null,"id":30111554338955,"position":3,"preview_image":{"aspect_ratio":1.0,"height":554,"width":554,"src":"\/\/australiantactical.com.au\/cdn\/shop\/files\/images_18_f59b3d49-363f-43ed-b813-ad429258a196.jpg?v=1757628015"},"aspect_ratio":1.0,"height":554,"media_type":"image","src":"\/\/australiantactical.com.au\/cdn\/shop\/files\/images_18_f59b3d49-363f-43ed-b813-ad429258a196.jpg?v=1757628015","width":554},{"alt":null,"id":30111554371723,"position":4,"preview_image":{"aspect_ratio":1.003,"height":1500,"width":1504,"src":"\/\/australiantactical.com.au\/cdn\/shop\/files\/PhotoRoom_20231005_084349_d473ebb8-75bf-47a0-b2d4-0e2ddf9a3da3.jpg?v=1757628015"},"aspect_ratio":1.003,"height":1500,"media_type":"image","src":"\/\/australiantactical.com.au\/cdn\/shop\/files\/PhotoRoom_20231005_084349_d473ebb8-75bf-47a0-b2d4-0e2ddf9a3da3.jpg?v=1757628015","width":1504}],"requires_selling_plan":false,"selling_plan_groups":[],"content":"\u003ch2 data-start=\"1057\" data-end=\"1076\"\u003eOBi Stax Block\u003c\/h2\u003e\n\u003cp data-start=\"1078\" data-end=\"1349\"\u003e\u003cstrong data-start=\"1078\" data-end=\"1112\"\u003eThe heart of die organisation.\u003c\/strong\u003e\u003cbr data-start=\"1112\" data-end=\"1115\"\u003eThe \u003cstrong data-start=\"1119\" data-end=\"1137\"\u003eOBi Stax Block\u003c\/strong\u003e is the core module of the system, holding your reloading dies neatly in place. Each Block connects to the Stax Bar and can be combined with other Blocks, Bushings, or Drops for a clean and modular bench setup.\u003c\/p\u003e\n\u003ch3 data-start=\"1351\" data-end=\"1365\"\u003eFeatures\u003c\/h3\u003e\n\u003cul data-start=\"1366\" data-end=\"1585\"\u003e\n\u003cli data-start=\"1366\" data-end=\"1437\"\u003e\n\u003cp data-start=\"1368\" data-end=\"1437\"\u003e\u003cstrong data-start=\"1368\" data-end=\"1386\"\u003eSecure storage\u003c\/strong\u003e – Keeps dies aligned, visible, and ready to use.\u003c\/p\u003e\n\u003c\/li\u003e\n\u003cli data-start=\"1438\" data-end=\"1509\"\u003e\n\u003cp data-start=\"1440\" data-end=\"1509\"\u003e\u003cstrong data-start=\"1440\" data-end=\"1461\"\u003eSystem compatible\u003c\/strong\u003e – Connects to the Stax Bar and scales easily.\u003c\/p\u003e\n\u003c\/li\u003e\n\u003cli data-start=\"1510\" data-end=\"1585\"\u003e\n\u003cp data-start=\"1512\" data-end=\"1585\"\u003e\u003cstrong data-start=\"1512\" data-end=\"1530\"\u003eCompact design\u003c\/strong\u003e – Takes up minimal space while adding maximum order.\u003c\/p\u003e\n\u003c\/li\u003e\n\u003c\/ul\u003e\n\u003ch3 data-start=\"1587\" data-end=\"1605\"\u003eRequirements\u003c\/h3\u003e\n\u003cul data-start=\"1606\" data-end=\"1667\"\u003e\n\u003cli data-start=\"1606\" data-end=\"1667\"\u003e\n\u003cp data-start=\"1608\" data-end=\"1667\"\u003eAt least one \u003cstrong data-start=\"1621\" data-end=\"1633\"\u003eStax Bar\u003c\/strong\u003e is required to mount the Block.\u003c\/p\u003e\n\u003c\/li\u003e\n\u003c\/ul\u003e\n\u003ch3 data-start=\"1669\" data-end=\"1685\"\u003eIn the box\u003c\/h3\u003e\n\u003cul data-start=\"1686\" data-end=\"1756\"\u003e\n\u003cli data-start=\"1686\" data-end=\"1756\"\u003e\n\u003cp data-start=\"1688\" data-end=\"1756\"\u003e1 × \u003cstrong data-start=\"1692\" data-end=\"1710\"\u003eOBi Stax Block\u003c\/strong\u003e (Bar, Bushings, and Drops sold separately).\u003c\/p\u003e\n\u003c\/li\u003e\n\u003c\/ul\u003e"}
OBi Stax Block
The heart of die organisation.
The OBi Stax Block is the core module of the system, holding your reloading dies neatly in place. Each Block connects to the Stax Bar and can be combined with other Blocks, Bushings, or Drops for a clean and modular bench setup.
Features
-
Secure storage – Keeps dies aligned, visible, and ready to use.
-
System compatible – Connects to the Stax Bar and scales easily.
-
Compact design – Takes up minimal space while adding maximum order.
Requirements
-
At least one Stax Bar is required to mount the Block.
In the box
-
1 × OBi Stax Block (Bar, Bushings, and Drops sold separately).
-
{"id":7902716723339,"title":"OBi Stax Drop","handle":"obi-stax-drop","description":"\u003cp class=\"MsoNormal\"\u003e\u003cb\u003eOBi Stax Drop\u003c\/b\u003e\u003c\/p\u003e\n\u003cp class=\"MsoNormal\"\u003e\u003cb\u003eBench-top support for your Stax setup.\u003c\/b\u003e\u003cbr\u003eThe \u003cb\u003eOBi Stax Drop\u003c\/b\u003e props the front of your Stax Blocks when used on a countertop, keeping your dies neat, stable, and easy to grab. It integrates seamlessly with the Stax Bar and the rest of the Stax ecosystem for a clean, modular reloading bench.\u003c\/p\u003e\n\u003cp class=\"MsoNormal\"\u003e\u003cb\u003eFeatures\u003c\/b\u003e\u003c\/p\u003e\n\u003cul style=\"margin-top: 0cm;\" type=\"disc\"\u003e\n\u003cli class=\"MsoNormal\" style=\"mso-list: l1 level1 lfo1; tab-stops: list 36.0pt;\"\u003e\n\u003cb\u003eStable support\u003c\/b\u003e – Prevents wobble when Stax Blocks sit on a bench.\u003c\/li\u003e\n\u003cli class=\"MsoNormal\" style=\"mso-list: l1 level1 lfo1; tab-stops: list 36.0pt;\"\u003e\n\u003cb\u003eSystem compatible\u003c\/b\u003e – Works with the Stax Bar and multiple Stax Blocks.\u003c\/li\u003e\n\u003cli class=\"MsoNormal\" style=\"mso-list: l1 level1 lfo1; tab-stops: list 36.0pt;\"\u003e\n\u003cb\u003eExpandable\u003c\/b\u003e – Add more Blocks or Drops as your collection grows.\u003c\/li\u003e\n\u003c\/ul\u003e\n\u003cp class=\"MsoNormal\"\u003e\u003cb\u003eRequirements\u003c\/b\u003e\u003c\/p\u003e\n\u003cul style=\"margin-top: 0cm;\" type=\"disc\"\u003e\n\u003cli class=\"MsoNormal\" style=\"mso-list: l2 level1 lfo2; tab-stops: list 36.0pt;\"\u003eAt least one \u003cb\u003eStax Bar\u003c\/b\u003e and one or more \u003cb\u003eStax Blocks\u003c\/b\u003e (sold separately).\u003c\/li\u003e\n\u003cli class=\"MsoNormal\" style=\"mso-list: l2 level1 lfo2; tab-stops: list 36.0pt;\"\u003eWhen setting up on a countertop, at least one \u003cb\u003eStax Drop\u003c\/b\u003e is required.\u003c\/li\u003e\n\u003c\/ul\u003e\n\u003cp class=\"MsoNormal\"\u003e\u003cb\u003eIn the box\u003c\/b\u003e\u003c\/p\u003e\n\u003cul style=\"margin-top: 0cm;\" type=\"disc\"\u003e\n\u003cli class=\"MsoNormal\" style=\"mso-list: l0 level1 lfo3; tab-stops: list 36.0pt;\"\u003e1 × \u003cb\u003eOBi Stax Drop\u003c\/b\u003e (Blocks, Bar, and accessories sold separately).\u003c\/li\u003e\n\u003c\/ul\u003e","published_at":"2025-09-12T08:05:29+10:00","created_at":"2025-09-12T07:47:56+10:00","vendor":"Australian Tactical","type":"","tags":["OBi","old balls inc","Reloading"],"price":4995,"price_min":4995,"price_max":4995,"available":true,"price_varies":false,"compare_at_price":null,"compare_at_price_min":0,"compare_at_price_max":0,"compare_at_price_varies":false,"variants":[{"id":43996311126155,"title":"Default Title","option1":"Default Title","option2":null,"option3":null,"sku":"StaxDrop","requires_shipping":true,"taxable":true,"featured_image":null,"available":true,"name":"OBi Stax Drop","public_title":null,"options":["Default Title"],"price":4995,"weight":1000,"compare_at_price":null,"inventory_management":"shopify","barcode":"","requires_selling_plan":false,"selling_plan_allocations":[]}],"images":["\/\/australiantactical.com.au\/cdn\/shop\/files\/Newdrop_1080x_042cd872-0a6a-4bb8-ad02-ea1154c4dadb.png?v=1757628115","\/\/australiantactical.com.au\/cdn\/shop\/files\/images_17.jpg?v=1757628115","\/\/australiantactical.com.au\/cdn\/shop\/files\/images_18.jpg?v=1757628115","\/\/australiantactical.com.au\/cdn\/shop\/files\/Newdropback_1080x_c1fe4519-fa2f-4d67-b529-b5b00d6b8639.png?v=1757627198","\/\/australiantactical.com.au\/cdn\/shop\/files\/Screenshot2023-10-05105457_1080x_c67b44a5-9980-4802-a9ba-ccb2b5246f49.png?v=1757627198","\/\/australiantactical.com.au\/cdn\/shop\/files\/PhotoRoom_20231005_084349_357e89cb-43e7-4c6d-950f-e2fb6b12d4ef.jpg?v=1757628103","\/\/australiantactical.com.au\/cdn\/shop\/files\/images_17_03119fe4-ab5b-42e0-81bf-fed58f35c233.jpg?v=1757628103","\/\/australiantactical.com.au\/cdn\/shop\/files\/images_18_db137db5-6399-4fa5-9268-cdd32340ef98.jpg?v=1757628103"],"featured_image":"\/\/australiantactical.com.au\/cdn\/shop\/files\/Newdrop_1080x_042cd872-0a6a-4bb8-ad02-ea1154c4dadb.png?v=1757628115","options":["Title"],"media":[{"alt":null,"id":30111469666443,"position":1,"preview_image":{"aspect_ratio":1.019,"height":1060,"width":1080,"src":"\/\/australiantactical.com.au\/cdn\/shop\/files\/Newdrop_1080x_042cd872-0a6a-4bb8-ad02-ea1154c4dadb.png?v=1757628115"},"aspect_ratio":1.019,"height":1060,"media_type":"image","src":"\/\/australiantactical.com.au\/cdn\/shop\/files\/Newdrop_1080x_042cd872-0a6a-4bb8-ad02-ea1154c4dadb.png?v=1757628115","width":1080},{"alt":null,"id":30111469600907,"position":2,"preview_image":{"aspect_ratio":1.0,"height":554,"width":554,"src":"\/\/australiantactical.com.au\/cdn\/shop\/files\/images_17.jpg?v=1757628115"},"aspect_ratio":1.0,"height":554,"media_type":"image","src":"\/\/australiantactical.com.au\/cdn\/shop\/files\/images_17.jpg?v=1757628115","width":554},{"alt":null,"id":30111469633675,"position":3,"preview_image":{"aspect_ratio":1.0,"height":554,"width":554,"src":"\/\/australiantactical.com.au\/cdn\/shop\/files\/images_18.jpg?v=1757628115"},"aspect_ratio":1.0,"height":554,"media_type":"image","src":"\/\/australiantactical.com.au\/cdn\/shop\/files\/images_18.jpg?v=1757628115","width":554},{"alt":null,"id":30111469699211,"position":4,"preview_image":{"aspect_ratio":1.076,"height":1004,"width":1080,"src":"\/\/australiantactical.com.au\/cdn\/shop\/files\/Newdropback_1080x_c1fe4519-fa2f-4d67-b529-b5b00d6b8639.png?v=1757627198"},"aspect_ratio":1.076,"height":1004,"media_type":"image","src":"\/\/australiantactical.com.au\/cdn\/shop\/files\/Newdropback_1080x_c1fe4519-fa2f-4d67-b529-b5b00d6b8639.png?v=1757627198","width":1080},{"alt":null,"id":30111469731979,"position":5,"preview_image":{"aspect_ratio":1.0,"height":855,"width":855,"src":"\/\/australiantactical.com.au\/cdn\/shop\/files\/Screenshot2023-10-05105457_1080x_c67b44a5-9980-4802-a9ba-ccb2b5246f49.png?v=1757627198"},"aspect_ratio":1.0,"height":855,"media_type":"image","src":"\/\/australiantactical.com.au\/cdn\/shop\/files\/Screenshot2023-10-05105457_1080x_c67b44a5-9980-4802-a9ba-ccb2b5246f49.png?v=1757627198","width":855},{"alt":null,"id":30111563415691,"position":6,"preview_image":{"aspect_ratio":1.003,"height":1500,"width":1504,"src":"\/\/australiantactical.com.au\/cdn\/shop\/files\/PhotoRoom_20231005_084349_357e89cb-43e7-4c6d-950f-e2fb6b12d4ef.jpg?v=1757628103"},"aspect_ratio":1.003,"height":1500,"media_type":"image","src":"\/\/australiantactical.com.au\/cdn\/shop\/files\/PhotoRoom_20231005_084349_357e89cb-43e7-4c6d-950f-e2fb6b12d4ef.jpg?v=1757628103","width":1504},{"alt":null,"id":30111563448459,"position":7,"preview_image":{"aspect_ratio":1.0,"height":554,"width":554,"src":"\/\/australiantactical.com.au\/cdn\/shop\/files\/images_17_03119fe4-ab5b-42e0-81bf-fed58f35c233.jpg?v=1757628103"},"aspect_ratio":1.0,"height":554,"media_type":"image","src":"\/\/australiantactical.com.au\/cdn\/shop\/files\/images_17_03119fe4-ab5b-42e0-81bf-fed58f35c233.jpg?v=1757628103","width":554},{"alt":null,"id":30111563481227,"position":8,"preview_image":{"aspect_ratio":1.0,"height":554,"width":554,"src":"\/\/australiantactical.com.au\/cdn\/shop\/files\/images_18_db137db5-6399-4fa5-9268-cdd32340ef98.jpg?v=1757628103"},"aspect_ratio":1.0,"height":554,"media_type":"image","src":"\/\/australiantactical.com.au\/cdn\/shop\/files\/images_18_db137db5-6399-4fa5-9268-cdd32340ef98.jpg?v=1757628103","width":554}],"requires_selling_plan":false,"selling_plan_groups":[],"content":"\u003cp class=\"MsoNormal\"\u003e\u003cb\u003eOBi Stax Drop\u003c\/b\u003e\u003c\/p\u003e\n\u003cp class=\"MsoNormal\"\u003e\u003cb\u003eBench-top support for your Stax setup.\u003c\/b\u003e\u003cbr\u003eThe \u003cb\u003eOBi Stax Drop\u003c\/b\u003e props the front of your Stax Blocks when used on a countertop, keeping your dies neat, stable, and easy to grab. It integrates seamlessly with the Stax Bar and the rest of the Stax ecosystem for a clean, modular reloading bench.\u003c\/p\u003e\n\u003cp class=\"MsoNormal\"\u003e\u003cb\u003eFeatures\u003c\/b\u003e\u003c\/p\u003e\n\u003cul style=\"margin-top: 0cm;\" type=\"disc\"\u003e\n\u003cli class=\"MsoNormal\" style=\"mso-list: l1 level1 lfo1; tab-stops: list 36.0pt;\"\u003e\n\u003cb\u003eStable support\u003c\/b\u003e – Prevents wobble when Stax Blocks sit on a bench.\u003c\/li\u003e\n\u003cli class=\"MsoNormal\" style=\"mso-list: l1 level1 lfo1; tab-stops: list 36.0pt;\"\u003e\n\u003cb\u003eSystem compatible\u003c\/b\u003e – Works with the Stax Bar and multiple Stax Blocks.\u003c\/li\u003e\n\u003cli class=\"MsoNormal\" style=\"mso-list: l1 level1 lfo1; tab-stops: list 36.0pt;\"\u003e\n\u003cb\u003eExpandable\u003c\/b\u003e – Add more Blocks or Drops as your collection grows.\u003c\/li\u003e\n\u003c\/ul\u003e\n\u003cp class=\"MsoNormal\"\u003e\u003cb\u003eRequirements\u003c\/b\u003e\u003c\/p\u003e\n\u003cul style=\"margin-top: 0cm;\" type=\"disc\"\u003e\n\u003cli class=\"MsoNormal\" style=\"mso-list: l2 level1 lfo2; tab-stops: list 36.0pt;\"\u003eAt least one \u003cb\u003eStax Bar\u003c\/b\u003e and one or more \u003cb\u003eStax Blocks\u003c\/b\u003e (sold separately).\u003c\/li\u003e\n\u003cli class=\"MsoNormal\" style=\"mso-list: l2 level1 lfo2; tab-stops: list 36.0pt;\"\u003eWhen setting up on a countertop, at least one \u003cb\u003eStax Drop\u003c\/b\u003e is required.\u003c\/li\u003e\n\u003c\/ul\u003e\n\u003cp class=\"MsoNormal\"\u003e\u003cb\u003eIn the box\u003c\/b\u003e\u003c\/p\u003e\n\u003cul style=\"margin-top: 0cm;\" type=\"disc\"\u003e\n\u003cli class=\"MsoNormal\" style=\"mso-list: l0 level1 lfo3; tab-stops: list 36.0pt;\"\u003e1 × \u003cb\u003eOBi Stax Drop\u003c\/b\u003e (Blocks, Bar, and accessories sold separately).\u003c\/li\u003e\n\u003c\/ul\u003e"}
OBi Stax Drop
Bench-top support for your Stax setup.
The OBi Stax Drop props the front of your Stax Blocks when used on a countertop, keeping your dies neat, stable, and easy to grab. It integrates seamlessly with the Stax Bar and the rest of the Stax ecosystem for a clean, modular reloading bench.
Features
- Stable support – Prevents wobble when Stax Blocks sit on a bench.
- System compatible – Works with the Stax Bar and multiple Stax Blocks.
- Expandable – Add more Blocks or Drops as your collection grows.
Requirements
- At least one Stax Bar and one or more Stax Blocks (sold separately).
- When setting up on a countertop, at least one Stax Drop is required.
In the box
- 1 × OBi Stax Drop (Blocks, Bar, and accessories sold separately).

-
{"id":7620484300939,"title":"OBi Link Anywhere Post","handle":"obi-link-anywhere-post-1","description":"\u003cp class=\"MsoNormal\"\u003eThe OBi LINK SYSTEM--AnyWhere Post can be attached to various gear. It attaches by either a bolt or a threaded stud. Once the AnyWhere Post is attached, you can connect it to any of the Locks in the OBi lineup. \u003c\/p\u003e\n\u003cp class=\"MsoNormal\"\u003eThe AnyWhere Post can be attached to any webbing or fabric using a Phillips screwdriver to push a small hole through the material. Then use the included screws and flange washer to compress the fabric or webbing, and it is ready to use. \u003c\/p\u003e\n\u003cp class=\"MsoNormal\"\u003eThe second way is to use an existing hole or drill a hole. Then use the included screws and flange washer to bolt the AnyWhere Post to your gear. \u003c\/p\u003e\n\u003cp class=\"MsoNormal\"\u003eThe following way to attach the AnywWhere Post is to thread it into a 10-32 threaded hole or drill and tap a 10-32 hole in whatever you want to attach it to. \u003c\/p\u003e","published_at":"2025-01-16T16:06:17+11:00","created_at":"2025-01-16T16:06:17+11:00","vendor":"Australian Tactical","type":"","tags":[],"price":8200,"price_min":8200,"price_max":8200,"available":true,"price_varies":false,"compare_at_price":null,"compare_at_price_min":0,"compare_at_price_max":0,"compare_at_price_varies":false,"variants":[{"id":43018050338955,"title":"Default Title","option1":"Default Title","option2":null,"option3":null,"sku":"OBi01103-BLK","requires_shipping":true,"taxable":true,"featured_image":null,"available":true,"name":"OBi Link Anywhere Post","public_title":null,"options":["Default Title"],"price":8200,"weight":1000,"compare_at_price":null,"inventory_management":"shopify","barcode":"","requires_selling_plan":false,"selling_plan_allocations":[]}],"images":["\/\/australiantactical.com.au\/cdn\/shop\/files\/DSC8301_900x_b7b4a841-32b3-4915-bc38-a9c3c1e6d3dc.jpg?v=1737003945","\/\/australiantactical.com.au\/cdn\/shop\/files\/7_900x_87dbe9a8-e63a-4d0e-b859-e05b20a1c4a6.png?v=1737003933","\/\/australiantactical.com.au\/cdn\/shop\/files\/31_900x_b1a77578-af23-4bbd-b733-6aa1073e3176.png?v=1737003934"],"featured_image":"\/\/australiantactical.com.au\/cdn\/shop\/files\/DSC8301_900x_b7b4a841-32b3-4915-bc38-a9c3c1e6d3dc.jpg?v=1737003945","options":["Title"],"media":[{"alt":null,"id":28107647484043,"position":1,"preview_image":{"aspect_ratio":1.0,"height":900,"width":900,"src":"\/\/australiantactical.com.au\/cdn\/shop\/files\/DSC8301_900x_b7b4a841-32b3-4915-bc38-a9c3c1e6d3dc.jpg?v=1737003945"},"aspect_ratio":1.0,"height":900,"media_type":"image","src":"\/\/australiantactical.com.au\/cdn\/shop\/files\/DSC8301_900x_b7b4a841-32b3-4915-bc38-a9c3c1e6d3dc.jpg?v=1737003945","width":900},{"alt":null,"id":28107646632075,"position":2,"preview_image":{"aspect_ratio":1.0,"height":900,"width":900,"src":"\/\/australiantactical.com.au\/cdn\/shop\/files\/7_900x_87dbe9a8-e63a-4d0e-b859-e05b20a1c4a6.png?v=1737003933"},"aspect_ratio":1.0,"height":900,"media_type":"image","src":"\/\/australiantactical.com.au\/cdn\/shop\/files\/7_900x_87dbe9a8-e63a-4d0e-b859-e05b20a1c4a6.png?v=1737003933","width":900},{"alt":null,"id":28107646664843,"position":3,"preview_image":{"aspect_ratio":1.0,"height":900,"width":900,"src":"\/\/australiantactical.com.au\/cdn\/shop\/files\/31_900x_b1a77578-af23-4bbd-b733-6aa1073e3176.png?v=1737003934"},"aspect_ratio":1.0,"height":900,"media_type":"image","src":"\/\/australiantactical.com.au\/cdn\/shop\/files\/31_900x_b1a77578-af23-4bbd-b733-6aa1073e3176.png?v=1737003934","width":900}],"requires_selling_plan":false,"selling_plan_groups":[],"content":"\u003cp class=\"MsoNormal\"\u003eThe OBi LINK SYSTEM--AnyWhere Post can be attached to various gear. It attaches by either a bolt or a threaded stud. Once the AnyWhere Post is attached, you can connect it to any of the Locks in the OBi lineup. \u003c\/p\u003e\n\u003cp class=\"MsoNormal\"\u003eThe AnyWhere Post can be attached to any webbing or fabric using a Phillips screwdriver to push a small hole through the material. Then use the included screws and flange washer to compress the fabric or webbing, and it is ready to use. \u003c\/p\u003e\n\u003cp class=\"MsoNormal\"\u003eThe second way is to use an existing hole or drill a hole. Then use the included screws and flange washer to bolt the AnyWhere Post to your gear. \u003c\/p\u003e\n\u003cp class=\"MsoNormal\"\u003eThe following way to attach the AnywWhere Post is to thread it into a 10-32 threaded hole or drill and tap a 10-32 hole in whatever you want to attach it to. \u003c\/p\u003e"}
The OBi LINK SYSTEM--AnyWhere Post can be attached to various gear. It attaches by either a bolt or a threaded stud. Once the AnyWhere Post is attached, you can connect it to any of the Locks in the OBi lineup.
The AnyWhere Post can be attached to any webbing or fabric using a Phillips screwdriver to push a small hole through the material. Then use the included screws and flange washer to compress the fabric or webbing, and it is ready to use.
The second way is to use an existing hole or drill a hole. Then use the included screws and flange washer to bolt the AnyWhere Post to your gear.
The following way to attach the AnywWhere Post is to thread it into a 10-32 threaded hole or drill and tap a 10-32 hole in whatever you want to attach it to.

-
{"id":7565186367627,"title":"OBi Link Clamp Lock","handle":"obi-link-clamp-lock","description":"\u003cp\u003eThe Clamp Lock bolts to any webbing from 1\/2 inch to 1.5 inches. The Clamp Lock mounts to your backpack or belt strap. Once mounted to your backpack or belt, you can connect any round or square posts.\u003c\/p\u003e\n\u003cp\u003e----NOTE---- You will need at least one Clamp Lock OR Slide Lock AND one RP M, QD P, or Anywhere Mount ----\u003c\/p\u003e","published_at":"2024-10-14T14:17:04+11:00","created_at":"2024-10-14T14:17:04+11:00","vendor":"My Store","type":"","tags":[],"price":9600,"price_min":9600,"price_max":9600,"available":true,"price_varies":false,"compare_at_price":null,"compare_at_price_min":0,"compare_at_price_max":0,"compare_at_price_varies":false,"variants":[{"id":42815800180875,"title":"Default Title","option1":"Default Title","option2":null,"option3":null,"sku":"","requires_shipping":true,"taxable":true,"featured_image":null,"available":true,"name":"OBi Link Clamp Lock","public_title":null,"options":["Default Title"],"price":9600,"weight":1000,"compare_at_price":null,"inventory_management":"shopify","barcode":"","requires_selling_plan":false,"selling_plan_allocations":[]}],"images":["\/\/australiantactical.com.au\/cdn\/shop\/files\/OBi_Link_Clamp_Lock_4.png?v=1728890362","\/\/australiantactical.com.au\/cdn\/shop\/files\/OBi_Link_Clamp_Lock_7.png?v=1728890362","\/\/australiantactical.com.au\/cdn\/shop\/files\/OBi_Link_Clamp_Lock.png?v=1728890360","\/\/australiantactical.com.au\/cdn\/shop\/files\/OBi_Link_Clamp_Lock_1.png?v=1728890363","\/\/australiantactical.com.au\/cdn\/shop\/files\/OBi_Link_Clamp_Lock_2.png?v=1728890363","\/\/australiantactical.com.au\/cdn\/shop\/files\/OBi_Link_Clamp_Lock_3.png?v=1728890363","\/\/australiantactical.com.au\/cdn\/shop\/files\/OBi_Link_Clamp_Lock_5.png?v=1728890363","\/\/australiantactical.com.au\/cdn\/shop\/files\/OBi_Link_Clamp_Lock_6.png?v=1728890363"],"featured_image":"\/\/australiantactical.com.au\/cdn\/shop\/files\/OBi_Link_Clamp_Lock_4.png?v=1728890362","options":["Title"],"media":[{"alt":null,"id":27613640360075,"position":1,"preview_image":{"aspect_ratio":1.0,"height":1024,"width":1024,"src":"\/\/australiantactical.com.au\/cdn\/shop\/files\/OBi_Link_Clamp_Lock_4.png?v=1728890362"},"aspect_ratio":1.0,"height":1024,"media_type":"image","src":"\/\/australiantactical.com.au\/cdn\/shop\/files\/OBi_Link_Clamp_Lock_4.png?v=1728890362","width":1024},{"alt":null,"id":27613640392843,"position":2,"preview_image":{"aspect_ratio":1.391,"height":736,"width":1024,"src":"\/\/australiantactical.com.au\/cdn\/shop\/files\/OBi_Link_Clamp_Lock_7.png?v=1728890362"},"aspect_ratio":1.391,"height":736,"media_type":"image","src":"\/\/australiantactical.com.au\/cdn\/shop\/files\/OBi_Link_Clamp_Lock_7.png?v=1728890362","width":1024},{"alt":null,"id":27613640130699,"position":3,"preview_image":{"aspect_ratio":1.0,"height":1024,"width":1024,"src":"\/\/australiantactical.com.au\/cdn\/shop\/files\/OBi_Link_Clamp_Lock.png?v=1728890360"},"aspect_ratio":1.0,"height":1024,"media_type":"image","src":"\/\/australiantactical.com.au\/cdn\/shop\/files\/OBi_Link_Clamp_Lock.png?v=1728890360","width":1024},{"alt":null,"id":27613640491147,"position":4,"preview_image":{"aspect_ratio":1.0,"height":1024,"width":1024,"src":"\/\/australiantactical.com.au\/cdn\/shop\/files\/OBi_Link_Clamp_Lock_1.png?v=1728890363"},"aspect_ratio":1.0,"height":1024,"media_type":"image","src":"\/\/australiantactical.com.au\/cdn\/shop\/files\/OBi_Link_Clamp_Lock_1.png?v=1728890363","width":1024},{"alt":null,"id":27613640523915,"position":5,"preview_image":{"aspect_ratio":1.0,"height":1024,"width":1024,"src":"\/\/australiantactical.com.au\/cdn\/shop\/files\/OBi_Link_Clamp_Lock_2.png?v=1728890363"},"aspect_ratio":1.0,"height":1024,"media_type":"image","src":"\/\/australiantactical.com.au\/cdn\/shop\/files\/OBi_Link_Clamp_Lock_2.png?v=1728890363","width":1024},{"alt":null,"id":27613640556683,"position":6,"preview_image":{"aspect_ratio":1.0,"height":1024,"width":1024,"src":"\/\/australiantactical.com.au\/cdn\/shop\/files\/OBi_Link_Clamp_Lock_3.png?v=1728890363"},"aspect_ratio":1.0,"height":1024,"media_type":"image","src":"\/\/australiantactical.com.au\/cdn\/shop\/files\/OBi_Link_Clamp_Lock_3.png?v=1728890363","width":1024},{"alt":null,"id":27613640458379,"position":7,"preview_image":{"aspect_ratio":1.114,"height":919,"width":1024,"src":"\/\/australiantactical.com.au\/cdn\/shop\/files\/OBi_Link_Clamp_Lock_5.png?v=1728890363"},"aspect_ratio":1.114,"height":919,"media_type":"image","src":"\/\/australiantactical.com.au\/cdn\/shop\/files\/OBi_Link_Clamp_Lock_5.png?v=1728890363","width":1024},{"alt":null,"id":27613640425611,"position":8,"preview_image":{"aspect_ratio":1.091,"height":937,"width":1022,"src":"\/\/australiantactical.com.au\/cdn\/shop\/files\/OBi_Link_Clamp_Lock_6.png?v=1728890363"},"aspect_ratio":1.091,"height":937,"media_type":"image","src":"\/\/australiantactical.com.au\/cdn\/shop\/files\/OBi_Link_Clamp_Lock_6.png?v=1728890363","width":1022}],"requires_selling_plan":false,"selling_plan_groups":[],"content":"\u003cp\u003eThe Clamp Lock bolts to any webbing from 1\/2 inch to 1.5 inches. The Clamp Lock mounts to your backpack or belt strap. Once mounted to your backpack or belt, you can connect any round or square posts.\u003c\/p\u003e\n\u003cp\u003e----NOTE---- You will need at least one Clamp Lock OR Slide Lock AND one RP M, QD P, or Anywhere Mount ----\u003c\/p\u003e"}
The Clamp Lock bolts to any webbing from 1/2 inch to 1.5 inches. The Clamp Lock mounts to your backpack or belt strap. Once mounted to your backpack or belt, you can connect any round or square posts.
----NOTE---- You will need at least one Clamp Lock OR Slide Lock AND one RP M, QD P, or Anywhere Mount ----

-
{"id":7620483088523,"title":"OBi Link Clamp lock with Tek Lok","handle":"obi-link-clamp-lock-with-tek-lok","description":"\u003cp class=\"MsoNormal\"\u003eThe Clamp Lock with TEK-LOK attaches to your belt or 1.5-2.24-inch strap. Once attached to your backpack or belt, you can connect any round or square posts. \u003c\/p\u003e","published_at":"2025-01-16T16:03:17+11:00","created_at":"2025-01-16T16:03:17+11:00","vendor":"Australian Tactical","type":"","tags":[],"price":11500,"price_min":11500,"price_max":11500,"available":true,"price_varies":false,"compare_at_price":null,"compare_at_price_min":0,"compare_at_price_max":0,"compare_at_price_varies":false,"variants":[{"id":43018045718667,"title":"Default Title","option1":"Default Title","option2":null,"option3":null,"sku":"OBi01003-BLK","requires_shipping":true,"taxable":true,"featured_image":null,"available":true,"name":"OBi Link Clamp lock with Tek Lok","public_title":null,"options":["Default Title"],"price":11500,"weight":1000,"compare_at_price":null,"inventory_management":"shopify","barcode":"","requires_selling_plan":false,"selling_plan_allocations":[]}],"images":["\/\/australiantactical.com.au\/cdn\/shop\/files\/EU2013645_001_l.jpg?v=1737003591","\/\/australiantactical.com.au\/cdn\/shop\/files\/Clamp_Lock_with_TEK-LOK_BLK_900x_62a44b94-2d4b-4976-a686-7b3cbef25104.png?v=1737003591","\/\/australiantactical.com.au\/cdn\/shop\/files\/Clamp_Lock_with_TEK-LOK_WHT_900x_e26cb629-5360-47f2-a3f9-c17984e9b0f6.png?v=1737003591","\/\/australiantactical.com.au\/cdn\/shop\/files\/hq720.jpg?v=1737003591"],"featured_image":"\/\/australiantactical.com.au\/cdn\/shop\/files\/EU2013645_001_l.jpg?v=1737003591","options":["Title"],"media":[{"alt":null,"id":28107629232267,"position":1,"preview_image":{"aspect_ratio":1.0,"height":1200,"width":1200,"src":"\/\/australiantactical.com.au\/cdn\/shop\/files\/EU2013645_001_l.jpg?v=1737003591"},"aspect_ratio":1.0,"height":1200,"media_type":"image","src":"\/\/australiantactical.com.au\/cdn\/shop\/files\/EU2013645_001_l.jpg?v=1737003591","width":1200},{"alt":null,"id":28107629166731,"position":2,"preview_image":{"aspect_ratio":1.0,"height":900,"width":900,"src":"\/\/australiantactical.com.au\/cdn\/shop\/files\/Clamp_Lock_with_TEK-LOK_BLK_900x_62a44b94-2d4b-4976-a686-7b3cbef25104.png?v=1737003591"},"aspect_ratio":1.0,"height":900,"media_type":"image","src":"\/\/australiantactical.com.au\/cdn\/shop\/files\/Clamp_Lock_with_TEK-LOK_BLK_900x_62a44b94-2d4b-4976-a686-7b3cbef25104.png?v=1737003591","width":900},{"alt":null,"id":28107629199499,"position":3,"preview_image":{"aspect_ratio":1.0,"height":900,"width":900,"src":"\/\/australiantactical.com.au\/cdn\/shop\/files\/Clamp_Lock_with_TEK-LOK_WHT_900x_e26cb629-5360-47f2-a3f9-c17984e9b0f6.png?v=1737003591"},"aspect_ratio":1.0,"height":900,"media_type":"image","src":"\/\/australiantactical.com.au\/cdn\/shop\/files\/Clamp_Lock_with_TEK-LOK_WHT_900x_e26cb629-5360-47f2-a3f9-c17984e9b0f6.png?v=1737003591","width":900},{"alt":null,"id":28107629265035,"position":4,"preview_image":{"aspect_ratio":1.777,"height":386,"width":686,"src":"\/\/australiantactical.com.au\/cdn\/shop\/files\/hq720.jpg?v=1737003591"},"aspect_ratio":1.777,"height":386,"media_type":"image","src":"\/\/australiantactical.com.au\/cdn\/shop\/files\/hq720.jpg?v=1737003591","width":686}],"requires_selling_plan":false,"selling_plan_groups":[],"content":"\u003cp class=\"MsoNormal\"\u003eThe Clamp Lock with TEK-LOK attaches to your belt or 1.5-2.24-inch strap. Once attached to your backpack or belt, you can connect any round or square posts. \u003c\/p\u003e"}
The Clamp Lock with TEK-LOK attaches to your belt or 1.5-2.24-inch strap. Once attached to your backpack or belt, you can connect any round or square posts.

-
{"id":7565186531467,"title":"OBi Link Grip on Round","handle":"obi-link-grip-on-round","description":"\u003cp\u003eThe Grip On Round is excellent for connecting tripods and water bottles to your backpack or belt. The Grip On Round comes standard with a Round Plate, which mounts in any direction. The Grip On Round also comes with a 9-inch strap and will fit most binoculars, tripod legs, smaller cups\/water bottles, and anything else you can find to attach. Attach the Grip On Round by loosening the strap until it fits around the gear, pull the strap snugly, then tighten the Allen bolt to the desired tension.\u003c\/p\u003e","published_at":"2024-10-14T14:18:35+11:00","created_at":"2024-10-14T14:18:35+11:00","vendor":"My Store","type":"","tags":[],"price":22000,"price_min":22000,"price_max":22000,"available":true,"price_varies":false,"compare_at_price":null,"compare_at_price_min":0,"compare_at_price_max":0,"compare_at_price_varies":false,"variants":[{"id":42815800803467,"title":"Default Title","option1":"Default Title","option2":null,"option3":null,"sku":"","requires_shipping":true,"taxable":true,"featured_image":null,"available":true,"name":"OBi Link Grip on Round","public_title":null,"options":["Default Title"],"price":22000,"weight":1000,"compare_at_price":null,"inventory_management":"shopify","barcode":"","requires_selling_plan":false,"selling_plan_allocations":[]}],"images":["\/\/australiantactical.com.au\/cdn\/shop\/files\/OBi_Link_Grip_on_Round.png?v=1728890432","\/\/australiantactical.com.au\/cdn\/shop\/files\/OBi_Link_Grip_on_Round_1.png?v=1728890434","\/\/australiantactical.com.au\/cdn\/shop\/files\/OBi_Link_Grip_on_Round_2.png?v=1728890435","\/\/australiantactical.com.au\/cdn\/shop\/files\/OBi_Link_Grip_on_Round_3.png?v=1728890435"],"featured_image":"\/\/australiantactical.com.au\/cdn\/shop\/files\/OBi_Link_Grip_on_Round.png?v=1728890432","options":["Title"],"media":[{"alt":null,"id":27613643931787,"position":1,"preview_image":{"aspect_ratio":1.0,"height":1024,"width":1024,"src":"\/\/australiantactical.com.au\/cdn\/shop\/files\/OBi_Link_Grip_on_Round.png?v=1728890432"},"aspect_ratio":1.0,"height":1024,"media_type":"image","src":"\/\/australiantactical.com.au\/cdn\/shop\/files\/OBi_Link_Grip_on_Round.png?v=1728890432","width":1024},{"alt":null,"id":27613644292235,"position":2,"preview_image":{"aspect_ratio":1.303,"height":786,"width":1024,"src":"\/\/australiantactical.com.au\/cdn\/shop\/files\/OBi_Link_Grip_on_Round_1.png?v=1728890434"},"aspect_ratio":1.303,"height":786,"media_type":"image","src":"\/\/australiantactical.com.au\/cdn\/shop\/files\/OBi_Link_Grip_on_Round_1.png?v=1728890434","width":1024},{"alt":null,"id":27613644325003,"position":3,"preview_image":{"aspect_ratio":1.078,"height":950,"width":1024,"src":"\/\/australiantactical.com.au\/cdn\/shop\/files\/OBi_Link_Grip_on_Round_2.png?v=1728890435"},"aspect_ratio":1.078,"height":950,"media_type":"image","src":"\/\/australiantactical.com.au\/cdn\/shop\/files\/OBi_Link_Grip_on_Round_2.png?v=1728890435","width":1024},{"alt":null,"id":27613644357771,"position":4,"preview_image":{"aspect_ratio":1.113,"height":920,"width":1024,"src":"\/\/australiantactical.com.au\/cdn\/shop\/files\/OBi_Link_Grip_on_Round_3.png?v=1728890435"},"aspect_ratio":1.113,"height":920,"media_type":"image","src":"\/\/australiantactical.com.au\/cdn\/shop\/files\/OBi_Link_Grip_on_Round_3.png?v=1728890435","width":1024}],"requires_selling_plan":false,"selling_plan_groups":[],"content":"\u003cp\u003eThe Grip On Round is excellent for connecting tripods and water bottles to your backpack or belt. The Grip On Round comes standard with a Round Plate, which mounts in any direction. The Grip On Round also comes with a 9-inch strap and will fit most binoculars, tripod legs, smaller cups\/water bottles, and anything else you can find to attach. Attach the Grip On Round by loosening the strap until it fits around the gear, pull the strap snugly, then tighten the Allen bolt to the desired tension.\u003c\/p\u003e"}
The Grip On Round is excellent for connecting tripods and water bottles to your backpack or belt. The Grip On Round comes standard with a Round Plate, which mounts in any direction. The Grip On Round also comes with a 9-inch strap and will fit most binoculars, tripod legs, smaller cups/water bottles, and anything else you can find to attach. Attach the Grip On Round by loosening the strap until it fits around the gear, pull the strap snugly, then tighten the Allen bolt to the desired tension.

-
{"id":7565185286283,"title":"OBi Link QD Post","handle":"obi-link-qd-post","description":"\u003cp\u003eThe Quick Detach Post or QD P is the family's most straightforward and toolless post. The QDP attaches to any flush cup, whether it is on your rifle, camera cage, or any other piece of kit you may want to connect to your backpack. Insert into the flush cup hole, depress the brass ball on the front with your thumb, and push. To remove, place the post between your forefingers, depress the brass ball, and pull out.\n\u003c\/p\u003e","published_at":"2024-10-14T14:10:14+11:00","created_at":"2024-10-14T14:10:14+11:00","vendor":"My Store","type":"","tags":[],"price":7600,"price_min":7600,"price_max":7600,"available":true,"price_varies":false,"compare_at_price":null,"compare_at_price_min":0,"compare_at_price_max":0,"compare_at_price_varies":false,"variants":[{"id":42815797854347,"title":"Default Title","option1":"Default Title","option2":null,"option3":null,"sku":"","requires_shipping":true,"taxable":true,"featured_image":null,"available":true,"name":"OBi Link QD Post","public_title":null,"options":["Default Title"],"price":7600,"weight":1000,"compare_at_price":null,"inventory_management":"shopify","barcode":"","requires_selling_plan":false,"selling_plan_allocations":[]}],"images":["\/\/australiantactical.com.au\/cdn\/shop\/files\/OBi_Link_QD_Post.png?v=1728890578","\/\/australiantactical.com.au\/cdn\/shop\/files\/OBi_Link_QD_Post_1.png?v=1728890580","\/\/australiantactical.com.au\/cdn\/shop\/files\/OBi_Link_QD_Post_2.png?v=1728890580"],"featured_image":"\/\/australiantactical.com.au\/cdn\/shop\/files\/OBi_Link_QD_Post.png?v=1728890578","options":["Title"],"media":[{"alt":null,"id":27613651009675,"position":1,"preview_image":{"aspect_ratio":1.0,"height":1024,"width":1024,"src":"\/\/australiantactical.com.au\/cdn\/shop\/files\/OBi_Link_QD_Post.png?v=1728890578"},"aspect_ratio":1.0,"height":1024,"media_type":"image","src":"\/\/australiantactical.com.au\/cdn\/shop\/files\/OBi_Link_QD_Post.png?v=1728890578","width":1024},{"alt":null,"id":27613651107979,"position":2,"preview_image":{"aspect_ratio":1.099,"height":918,"width":1009,"src":"\/\/australiantactical.com.au\/cdn\/shop\/files\/OBi_Link_QD_Post_1.png?v=1728890580"},"aspect_ratio":1.099,"height":918,"media_type":"image","src":"\/\/australiantactical.com.au\/cdn\/shop\/files\/OBi_Link_QD_Post_1.png?v=1728890580","width":1009},{"alt":null,"id":27613651075211,"position":3,"preview_image":{"aspect_ratio":1.14,"height":898,"width":1024,"src":"\/\/australiantactical.com.au\/cdn\/shop\/files\/OBi_Link_QD_Post_2.png?v=1728890580"},"aspect_ratio":1.14,"height":898,"media_type":"image","src":"\/\/australiantactical.com.au\/cdn\/shop\/files\/OBi_Link_QD_Post_2.png?v=1728890580","width":1024}],"requires_selling_plan":false,"selling_plan_groups":[],"content":"\u003cp\u003eThe Quick Detach Post or QD P is the family's most straightforward and toolless post. The QDP attaches to any flush cup, whether it is on your rifle, camera cage, or any other piece of kit you may want to connect to your backpack. Insert into the flush cup hole, depress the brass ball on the front with your thumb, and push. To remove, place the post between your forefingers, depress the brass ball, and pull out.\n\u003c\/p\u003e"}
The Quick Detach Post or QD P is the family's most straightforward and toolless post. The QDP attaches to any flush cup, whether it is on your rifle, camera cage, or any other piece of kit you may want to connect to your backpack. Insert into the flush cup hole, depress the brass ball on the front with your thumb, and push. To remove, place the post between your forefingers, depress the brass ball, and pull out.

-
{"id":7565185908875,"title":"OBi Link Round Post M-Lok","handle":"obi-link-round-post-m-lok","description":"\u003cp\u003eThe Round Post M-lok or RPM mounts to the M-lok slot on the forend of your rifle stock or any other piece of gear with an M-lok slot or similar hole spacing. Once it is attached to your rifle or other equipment, it connects to any of the Lock or Grip On families.\n\u003c\/p\u003e","published_at":"2024-10-14T14:14:04+11:00","created_at":"2024-10-14T14:14:04+11:00","vendor":"My Store","type":"","tags":[],"price":7600,"price_min":7600,"price_max":7600,"available":true,"price_varies":false,"compare_at_price":null,"compare_at_price_min":0,"compare_at_price_max":0,"compare_at_price_varies":false,"variants":[{"id":42815799001227,"title":"Default Title","option1":"Default Title","option2":null,"option3":null,"sku":"","requires_shipping":true,"taxable":true,"featured_image":null,"available":true,"name":"OBi Link Round Post M-Lok","public_title":null,"options":["Default Title"],"price":7600,"weight":1000,"compare_at_price":null,"inventory_management":"shopify","barcode":"","requires_selling_plan":false,"selling_plan_allocations":[]}],"images":["\/\/australiantactical.com.au\/cdn\/shop\/files\/OBi_Link_Round_Post_M-Lok.png?v=1728890631","\/\/australiantactical.com.au\/cdn\/shop\/files\/OBi_Link_Round_Post_M-Lok_2.png?v=1728890634","\/\/australiantactical.com.au\/cdn\/shop\/files\/OBi_Link_Round_Post_M-Lok_3.png?v=1728890634","\/\/australiantactical.com.au\/cdn\/shop\/files\/OBi_Link_Round_Post_M-Lok_4.png?v=1728890634"],"featured_image":"\/\/australiantactical.com.au\/cdn\/shop\/files\/OBi_Link_Round_Post_M-Lok.png?v=1728890631","options":["Title"],"media":[{"alt":null,"id":27613653368971,"position":1,"preview_image":{"aspect_ratio":1.0,"height":1024,"width":1024,"src":"\/\/australiantactical.com.au\/cdn\/shop\/files\/OBi_Link_Round_Post_M-Lok.png?v=1728890631"},"aspect_ratio":1.0,"height":1024,"media_type":"image","src":"\/\/australiantactical.com.au\/cdn\/shop\/files\/OBi_Link_Round_Post_M-Lok.png?v=1728890631","width":1024},{"alt":null,"id":27613653532811,"position":2,"preview_image":{"aspect_ratio":1.185,"height":864,"width":1024,"src":"\/\/australiantactical.com.au\/cdn\/shop\/files\/OBi_Link_Round_Post_M-Lok_2.png?v=1728890634"},"aspect_ratio":1.185,"height":864,"media_type":"image","src":"\/\/australiantactical.com.au\/cdn\/shop\/files\/OBi_Link_Round_Post_M-Lok_2.png?v=1728890634","width":1024},{"alt":null,"id":27613653565579,"position":3,"preview_image":{"aspect_ratio":1.095,"height":926,"width":1014,"src":"\/\/australiantactical.com.au\/cdn\/shop\/files\/OBi_Link_Round_Post_M-Lok_3.png?v=1728890634"},"aspect_ratio":1.095,"height":926,"media_type":"image","src":"\/\/australiantactical.com.au\/cdn\/shop\/files\/OBi_Link_Round_Post_M-Lok_3.png?v=1728890634","width":1014},{"alt":null,"id":27613653598347,"position":4,"preview_image":{"aspect_ratio":1.142,"height":897,"width":1024,"src":"\/\/australiantactical.com.au\/cdn\/shop\/files\/OBi_Link_Round_Post_M-Lok_4.png?v=1728890634"},"aspect_ratio":1.142,"height":897,"media_type":"image","src":"\/\/australiantactical.com.au\/cdn\/shop\/files\/OBi_Link_Round_Post_M-Lok_4.png?v=1728890634","width":1024}],"requires_selling_plan":false,"selling_plan_groups":[],"content":"\u003cp\u003eThe Round Post M-lok or RPM mounts to the M-lok slot on the forend of your rifle stock or any other piece of gear with an M-lok slot or similar hole spacing. Once it is attached to your rifle or other equipment, it connects to any of the Lock or Grip On families.\n\u003c\/p\u003e"}
The Round Post M-lok or RPM mounts to the M-lok slot on the forend of your rifle stock or any other piece of gear with an M-lok slot or similar hole spacing. Once it is attached to your rifle or other equipment, it connects to any of the Lock or Grip On families.

-
{"id":7565186891915,"title":"OBi Link Round Post MPA BA","handle":"obi-link-round-post-mpa-ba","description":"\u003cp\u003eThe Round Post BA or RPM mounts to the BA slot on the forend of your MPA rifle chassis. Once it is attached to your rifle or other equipment, it connects to any of the Lock or Grip On families.\u003c\/p\u003e","published_at":"2024-10-14T14:22:44+11:00","created_at":"2024-10-14T14:22:44+11:00","vendor":"My Store","type":"","tags":[],"price":7600,"price_min":7600,"price_max":7600,"available":true,"price_varies":false,"compare_at_price":null,"compare_at_price_min":0,"compare_at_price_max":0,"compare_at_price_varies":false,"variants":[{"id":42815802278027,"title":"Default Title","option1":"Default Title","option2":null,"option3":null,"sku":"","requires_shipping":true,"taxable":true,"featured_image":null,"available":true,"name":"OBi Link Round Post MPA BA","public_title":null,"options":["Default Title"],"price":7600,"weight":1000,"compare_at_price":null,"inventory_management":"shopify","barcode":"","requires_selling_plan":false,"selling_plan_allocations":[]}],"images":["\/\/australiantactical.com.au\/cdn\/shop\/files\/OBi_Link_Round_Post_MPA_BA.png?v=1728890677","\/\/australiantactical.com.au\/cdn\/shop\/files\/OBi_Link_Round_Post_MPA_BA_1.png?v=1728890677"],"featured_image":"\/\/australiantactical.com.au\/cdn\/shop\/files\/OBi_Link_Round_Post_MPA_BA.png?v=1728890677","options":["Title"],"media":[{"alt":null,"id":27613655990411,"position":1,"preview_image":{"aspect_ratio":1.0,"height":1024,"width":1024,"src":"\/\/australiantactical.com.au\/cdn\/shop\/files\/OBi_Link_Round_Post_MPA_BA.png?v=1728890677"},"aspect_ratio":1.0,"height":1024,"media_type":"image","src":"\/\/australiantactical.com.au\/cdn\/shop\/files\/OBi_Link_Round_Post_MPA_BA.png?v=1728890677","width":1024},{"alt":null,"id":27613656023179,"position":2,"preview_image":{"aspect_ratio":1.185,"height":864,"width":1024,"src":"\/\/australiantactical.com.au\/cdn\/shop\/files\/OBi_Link_Round_Post_MPA_BA_1.png?v=1728890677"},"aspect_ratio":1.185,"height":864,"media_type":"image","src":"\/\/australiantactical.com.au\/cdn\/shop\/files\/OBi_Link_Round_Post_MPA_BA_1.png?v=1728890677","width":1024}],"requires_selling_plan":false,"selling_plan_groups":[],"content":"\u003cp\u003eThe Round Post BA or RPM mounts to the BA slot on the forend of your MPA rifle chassis. Once it is attached to your rifle or other equipment, it connects to any of the Lock or Grip On families.\u003c\/p\u003e"}
The Round Post BA or RPM mounts to the BA slot on the forend of your MPA rifle chassis. Once it is attached to your rifle or other equipment, it connects to any of the Lock or Grip On families.


